StackBooster Discover Cluster Guide #
Overview #
This guide walks you through connecting your first StackBooster-managed cluster on AWS using our AI DevOps agent copilot platform. You’ll make an AI-optimized cluster configuration that provides immediate cost savings and seamless cluster management.
Getting Started #
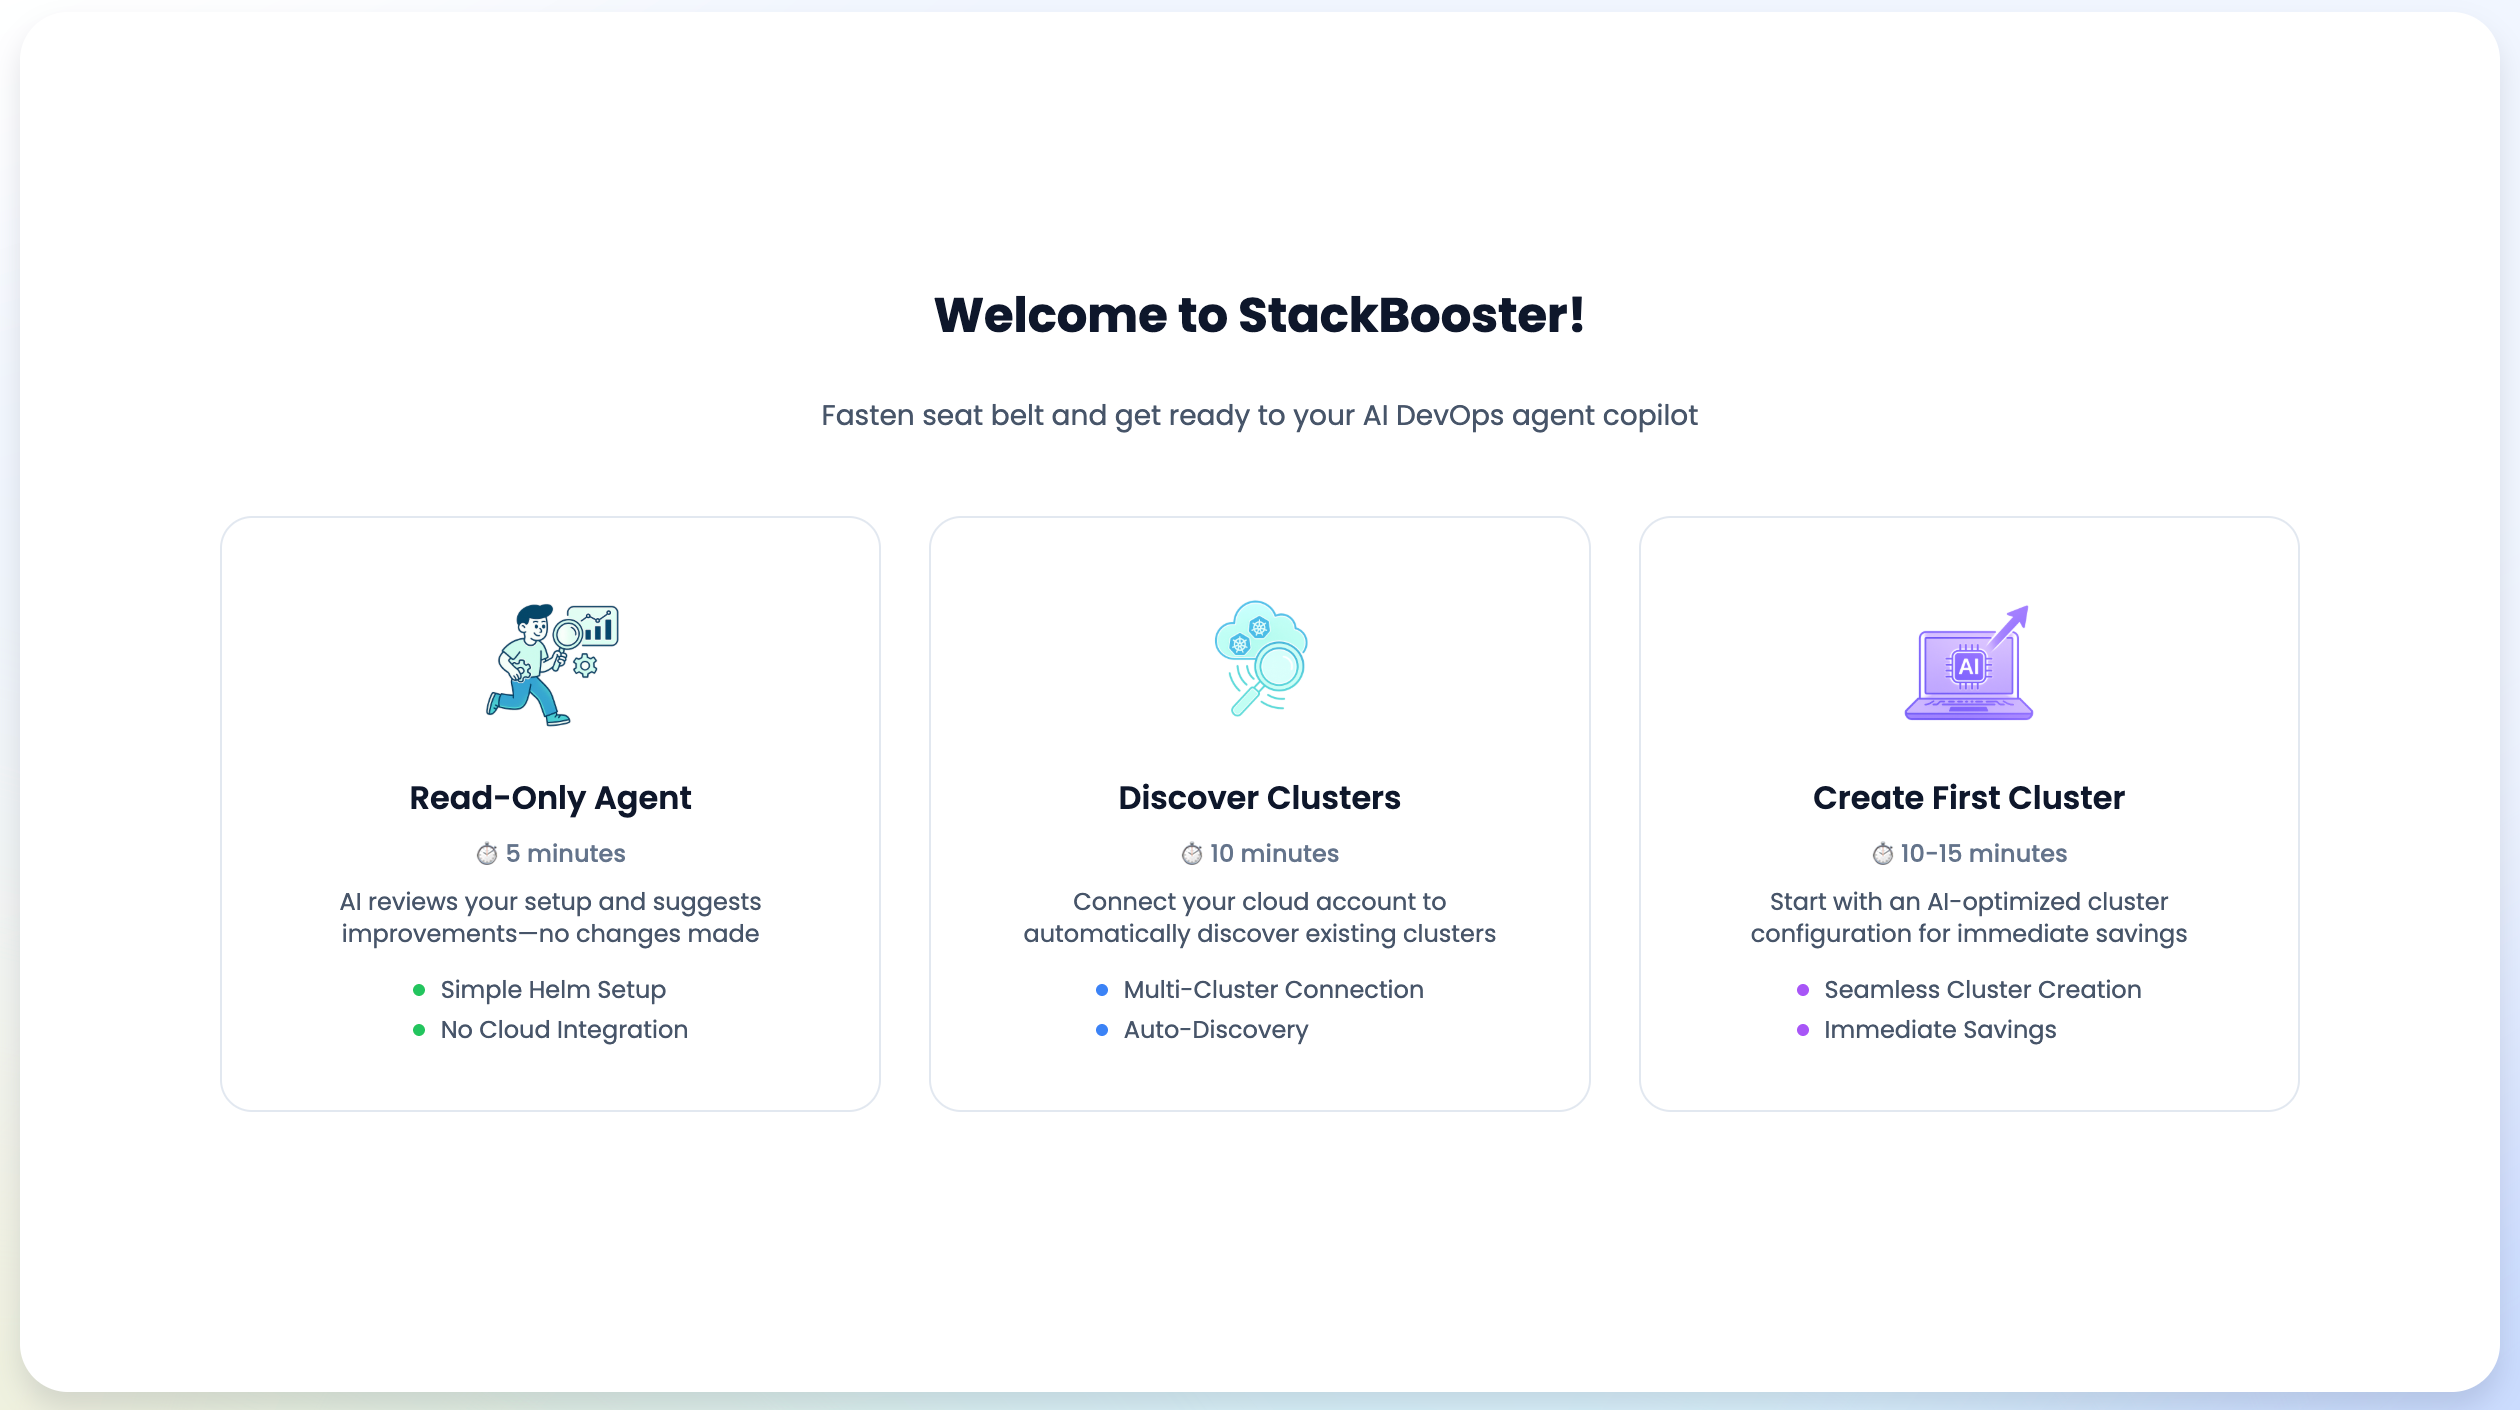
When you first access StackBooster, you’ll be presented with three main setup options:
- Read-Only Agent (5 minutes) - AI reviews your setup and suggests improvements with no changes made
- Discover Clusters (10 minutes) - Connect your cloud account to automatically discover existing clusters
- Create First Cluster (10-15 minutes) - Start with an AI-optimized cluster configuration for immediate savings
This guide focuses on the Discover Cluster option, which provides seamless cluster connection and immediate cost savings.
Step 1: Add Your Cloud Account #
Account Configuration #
- Add Alias Name
- Enter a friendly name for your cloud account
- Examples:
DemoAccount,production-aws, or your organization name
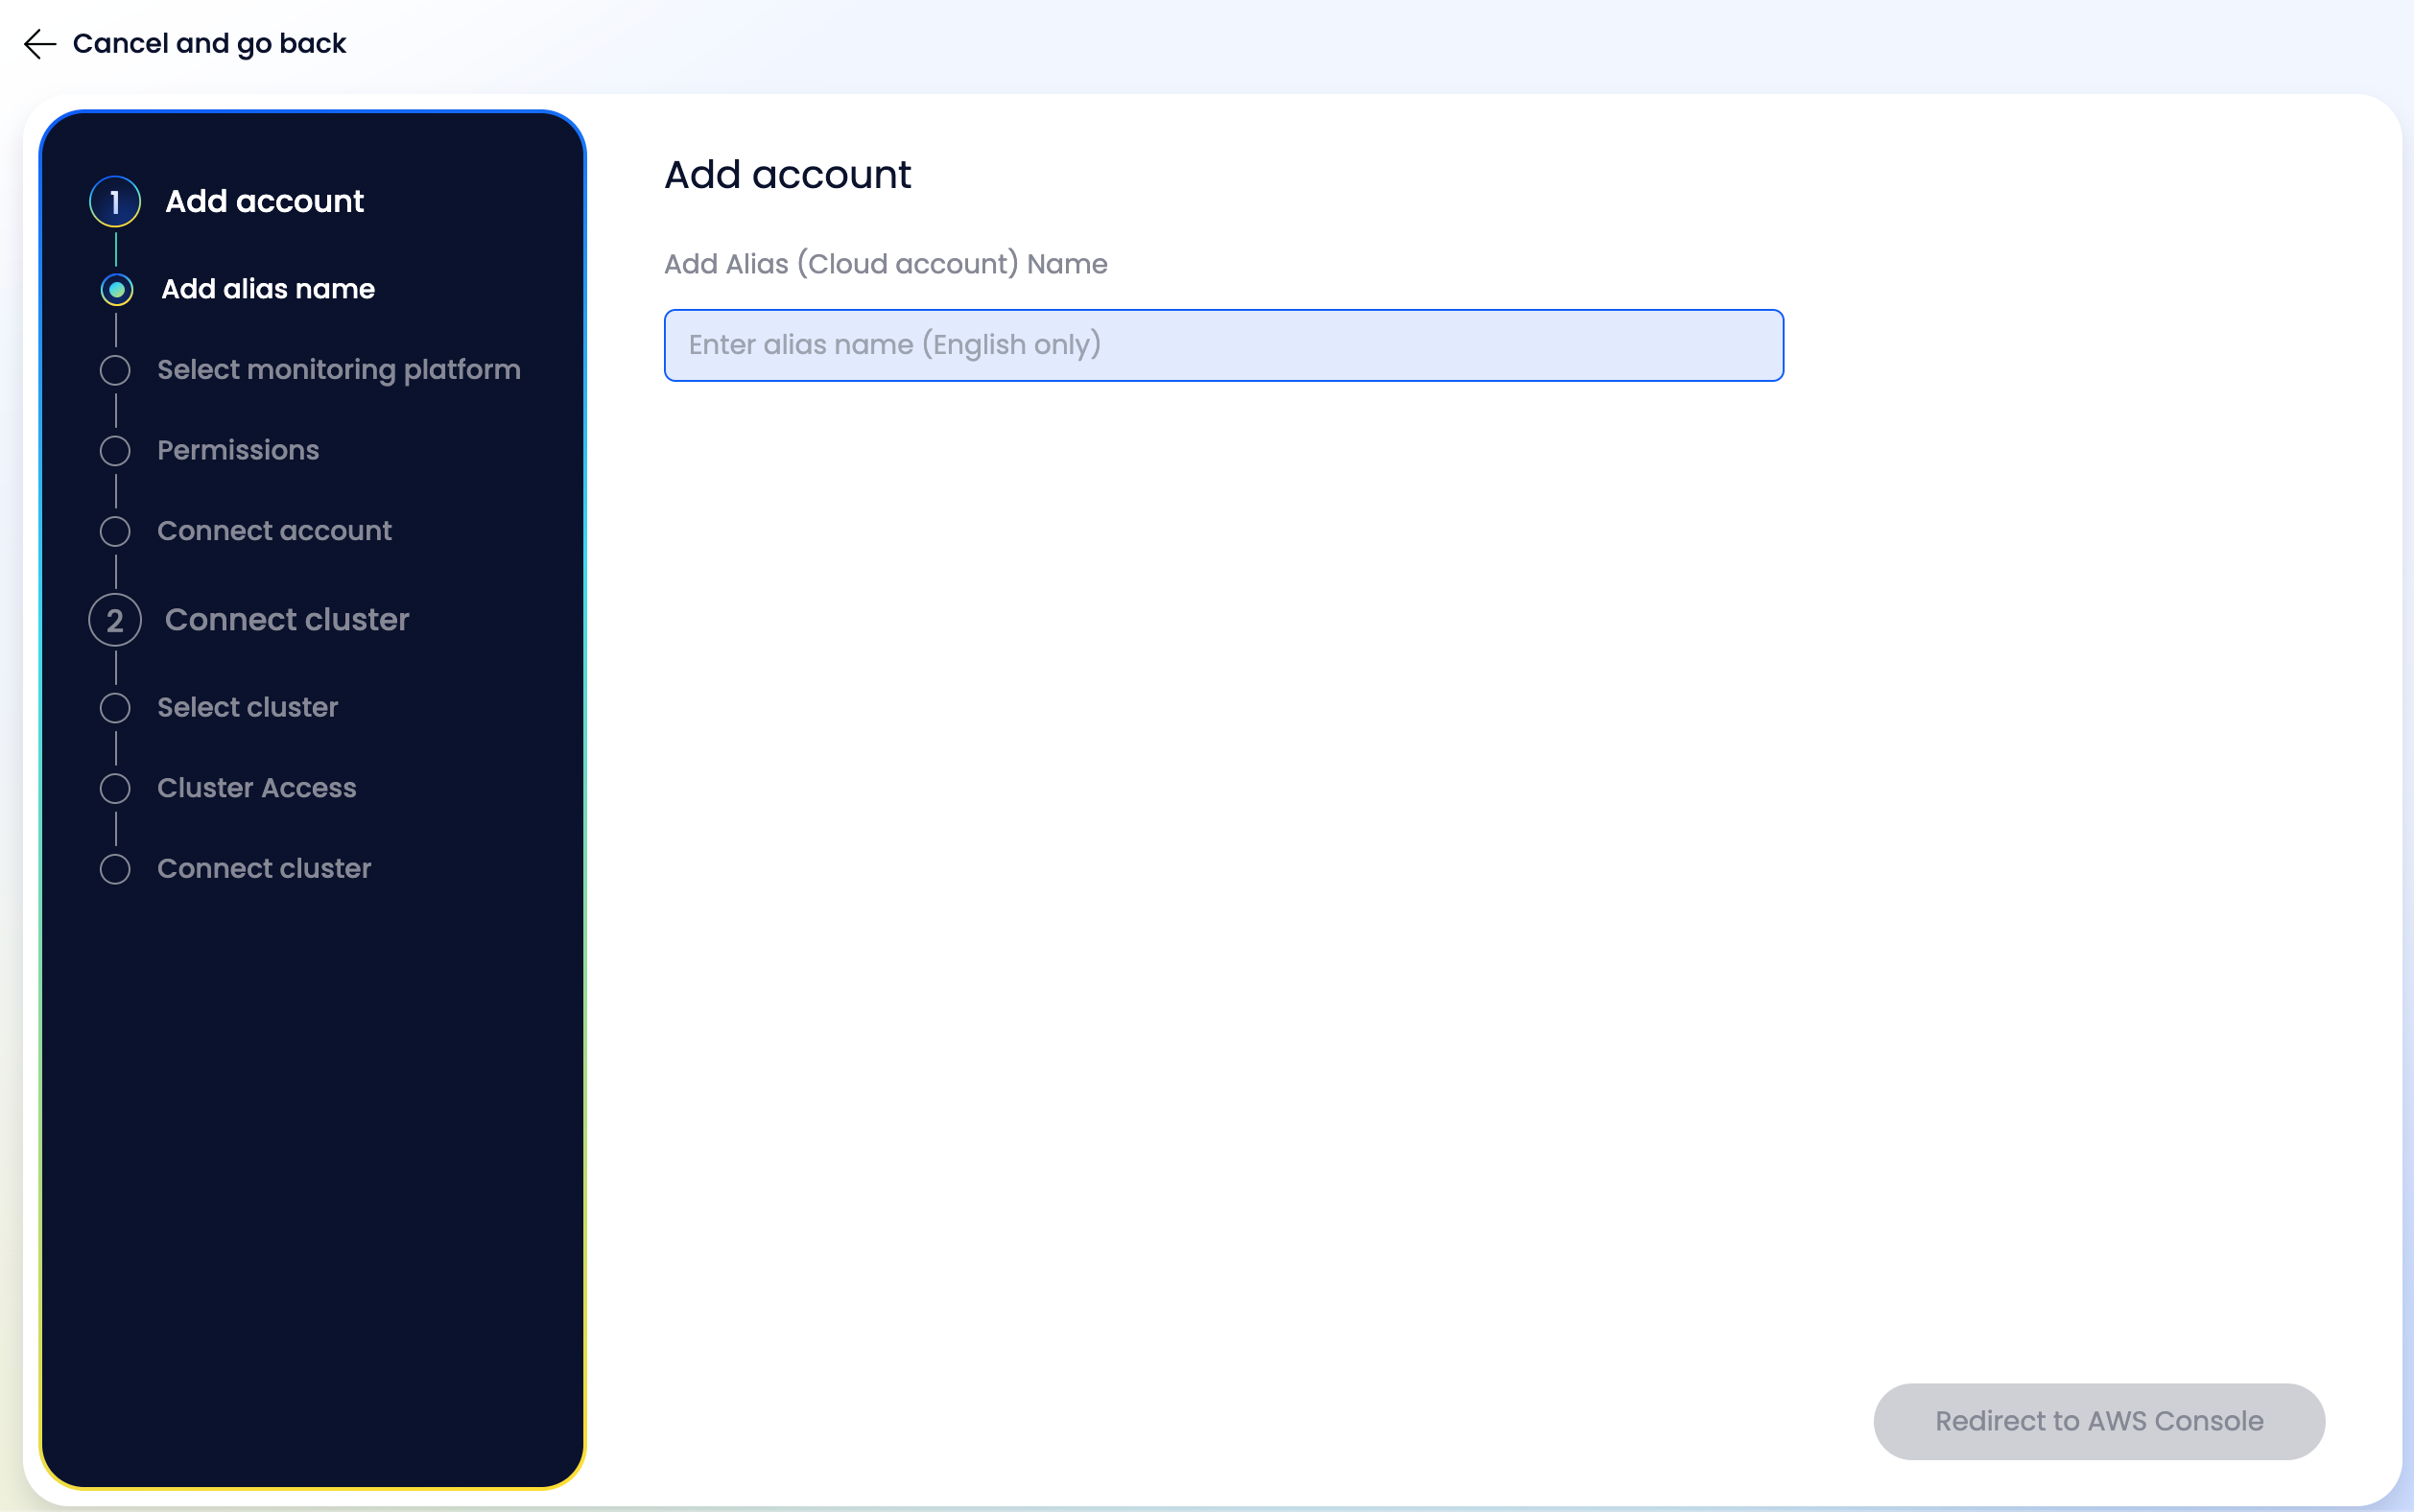
Choose Cloud Provider
- Select Amazon Web Services (AWS)
Choose Permission Level
- Read-Only Access (Discovery): Recommended for initial setup
- Autoscaling Access: For automated scaling operations
- Full Control (EKS Creation & Deletion): For complete cluster management
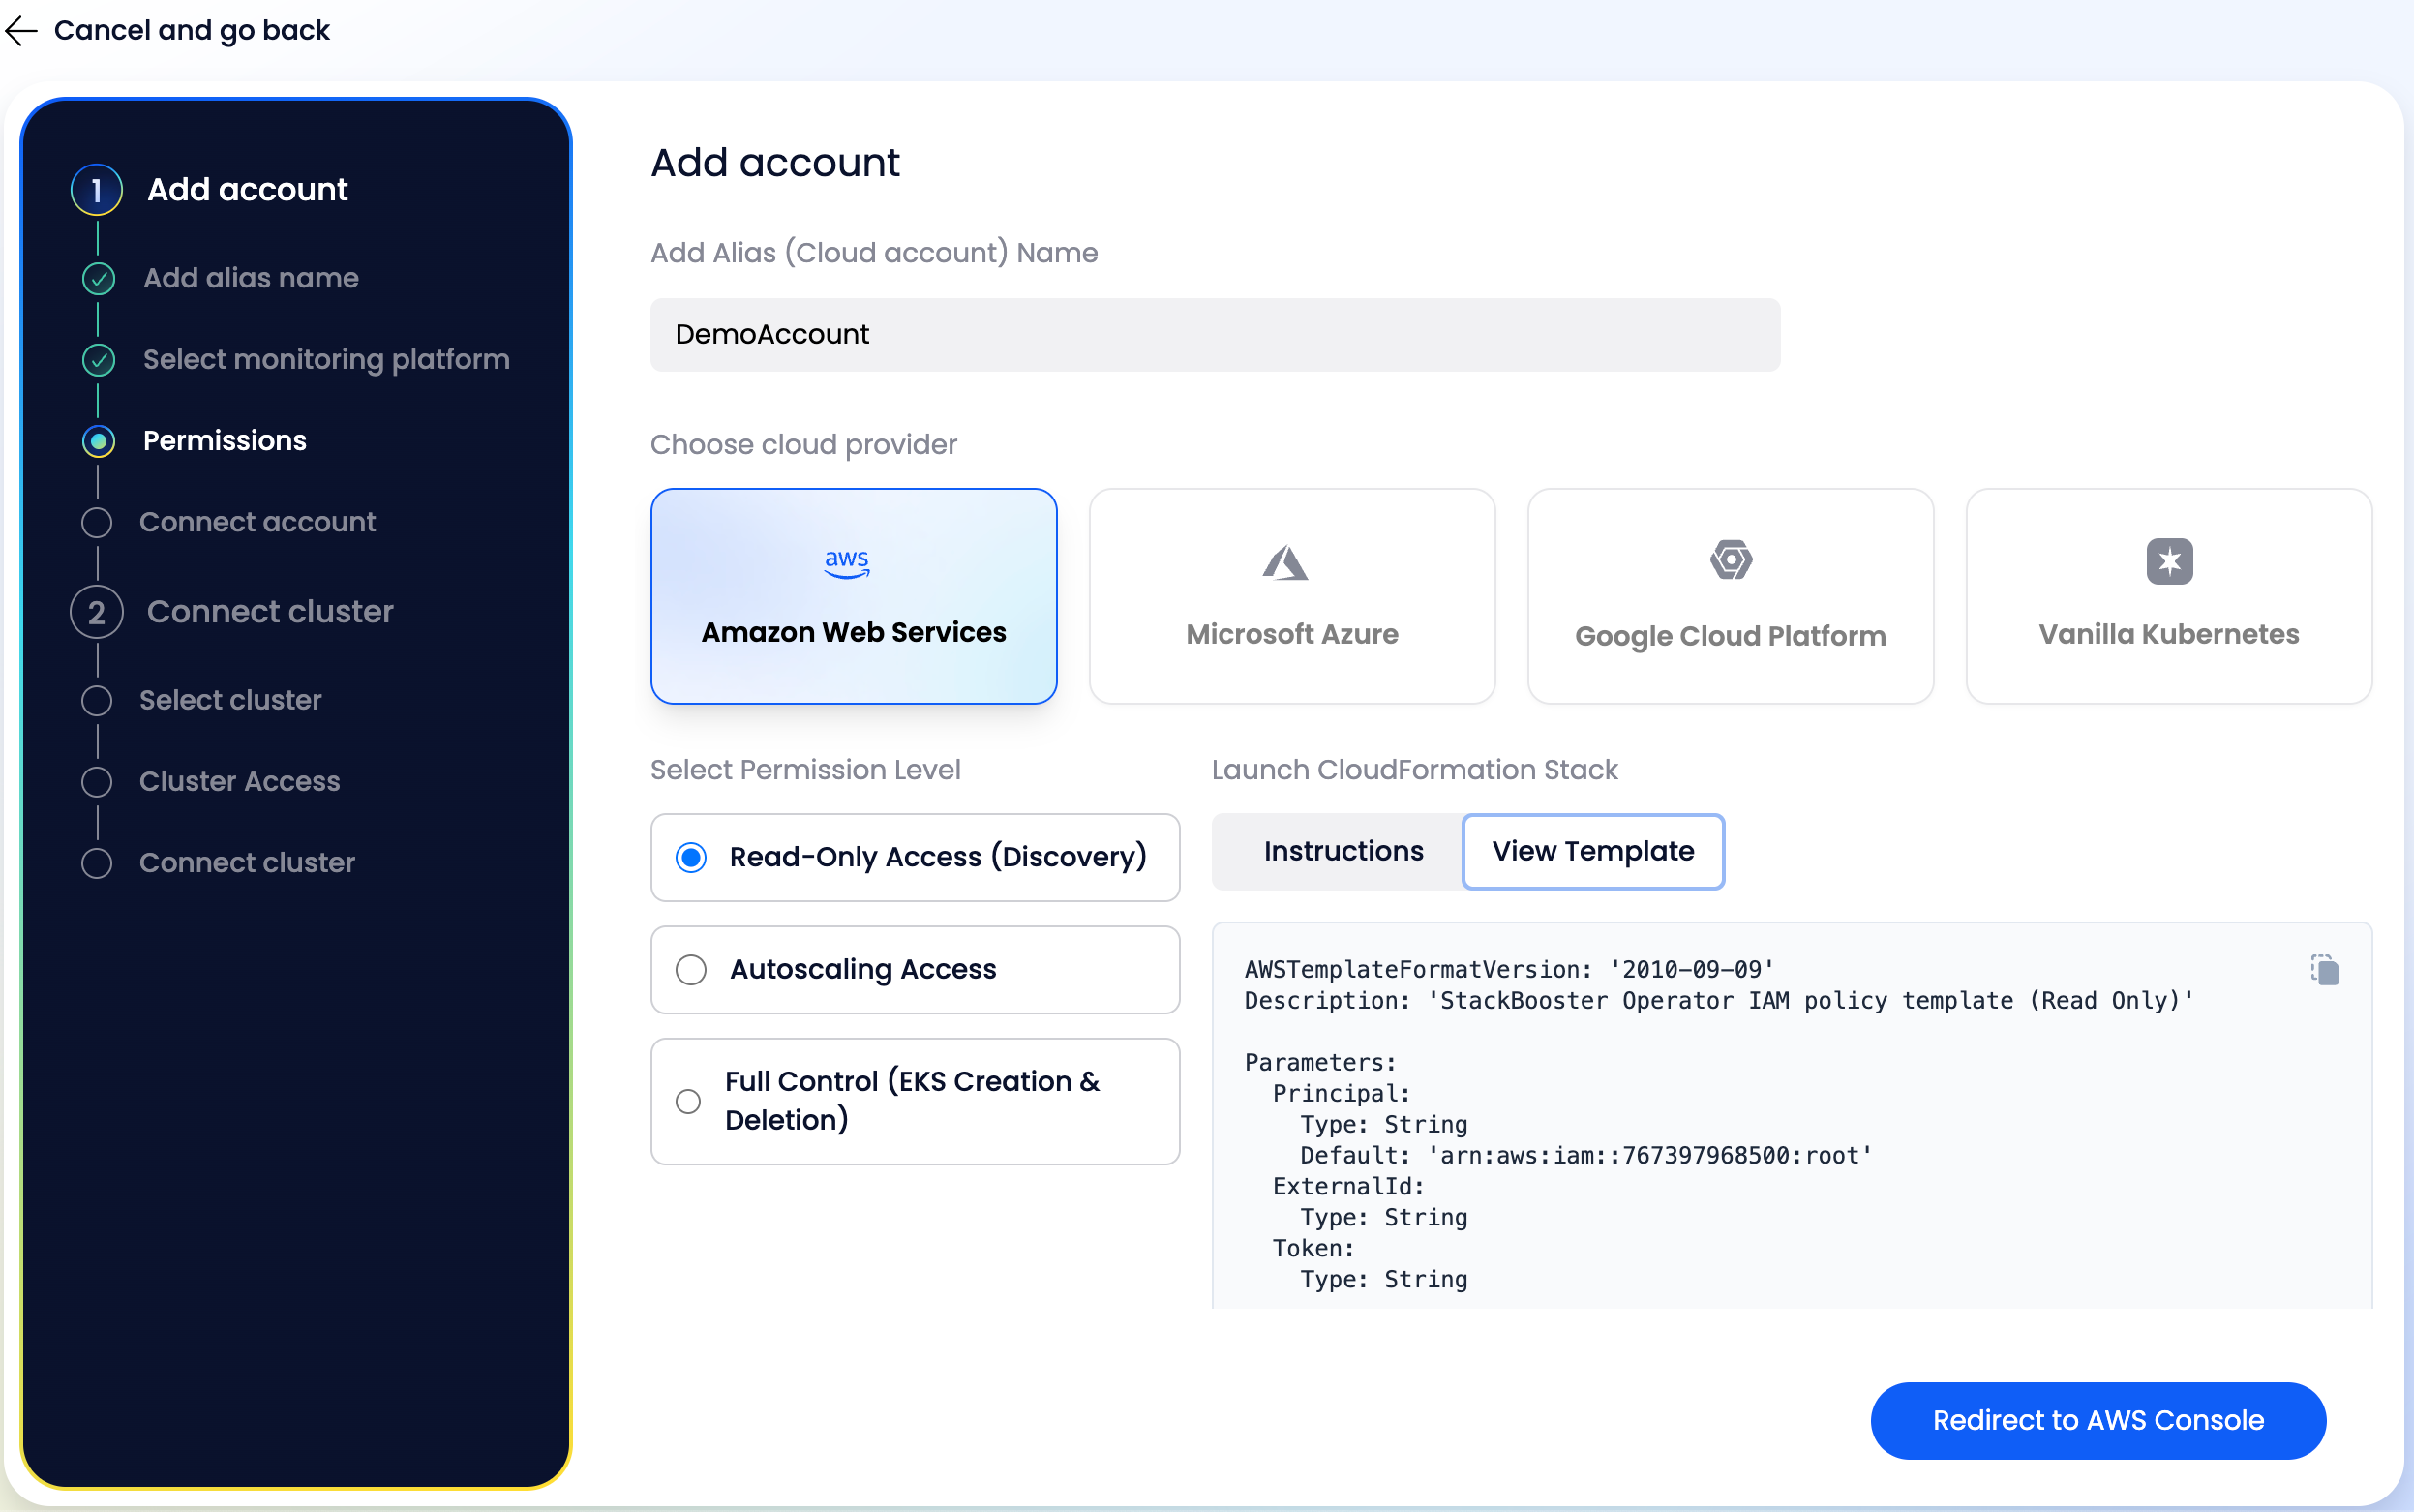
Deploy CloudFormation Stack #
- Review Template: Examine the CloudFormation template displayed in the UI
- Redirect to AWS: Click the “Redirect to AWS Console” button
- Ensure you’re logged into the correct AWS account first
- Deploy Stack:
- Review the template details in the AWS console
- Under Capabilities, check: ☑️ “I acknowledge that AWS CloudFormation might create IAM resources”
- Click “Create stack”
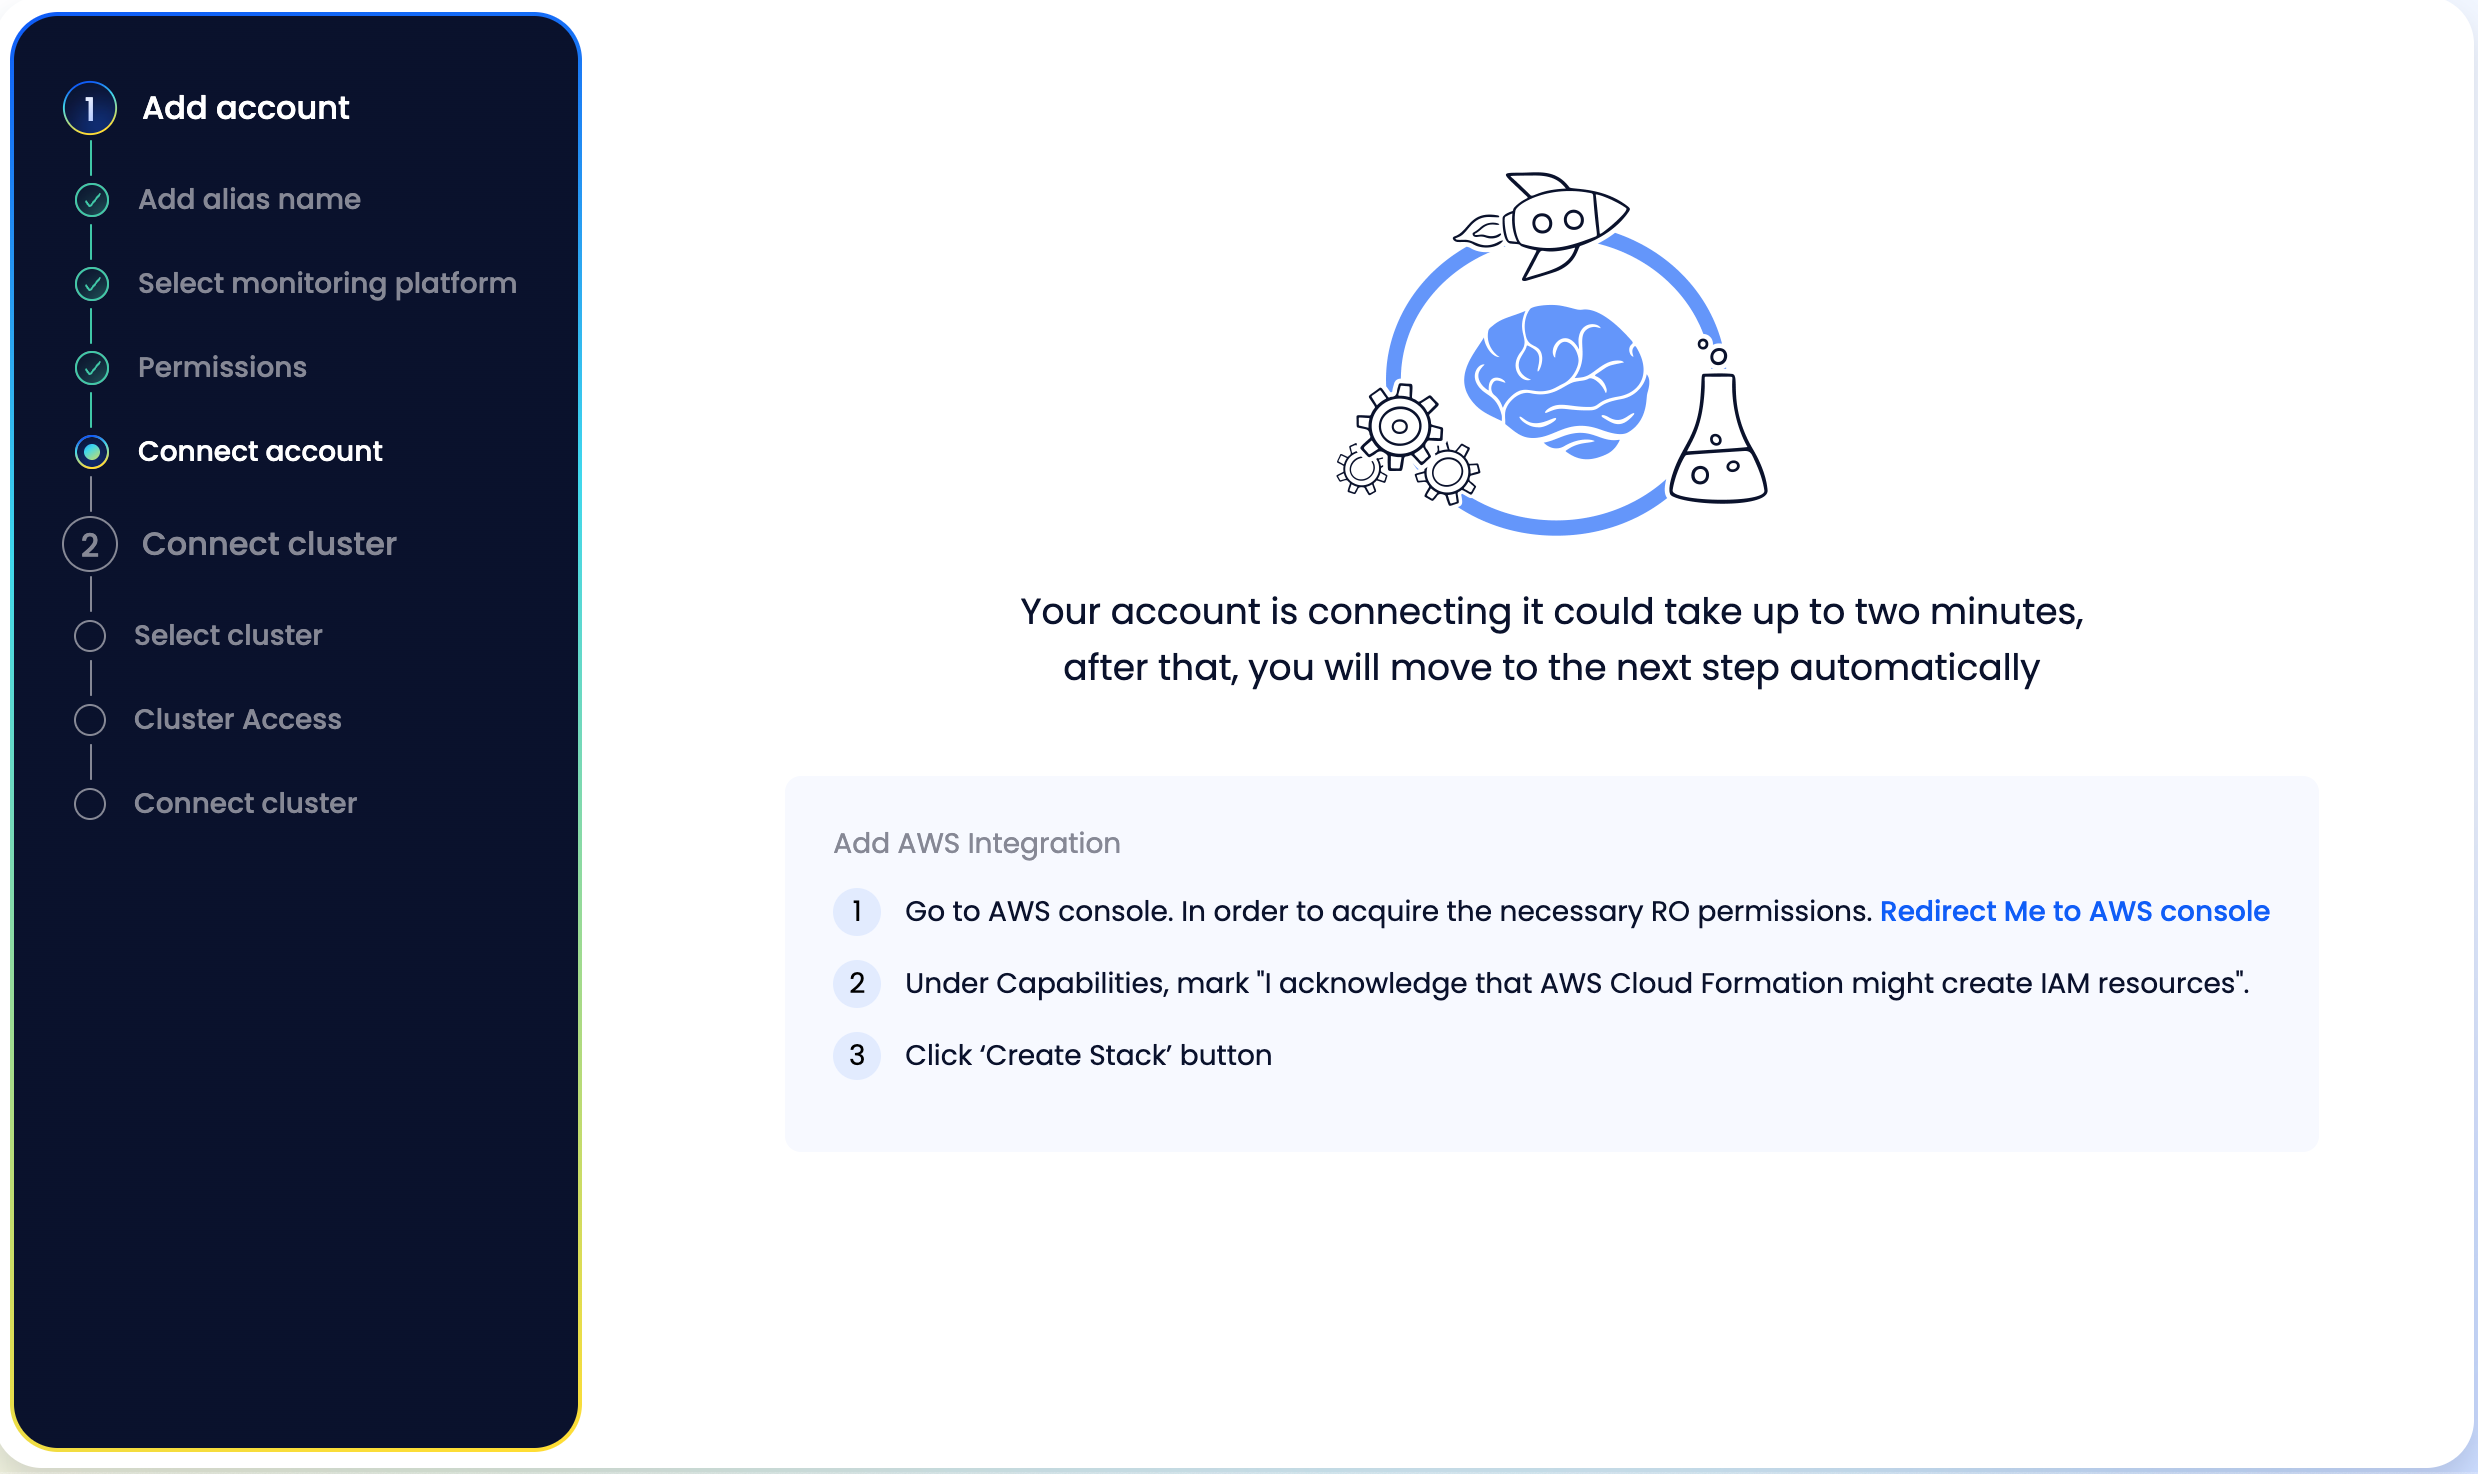
- Return to StackBooster once the stack is successfully deployed

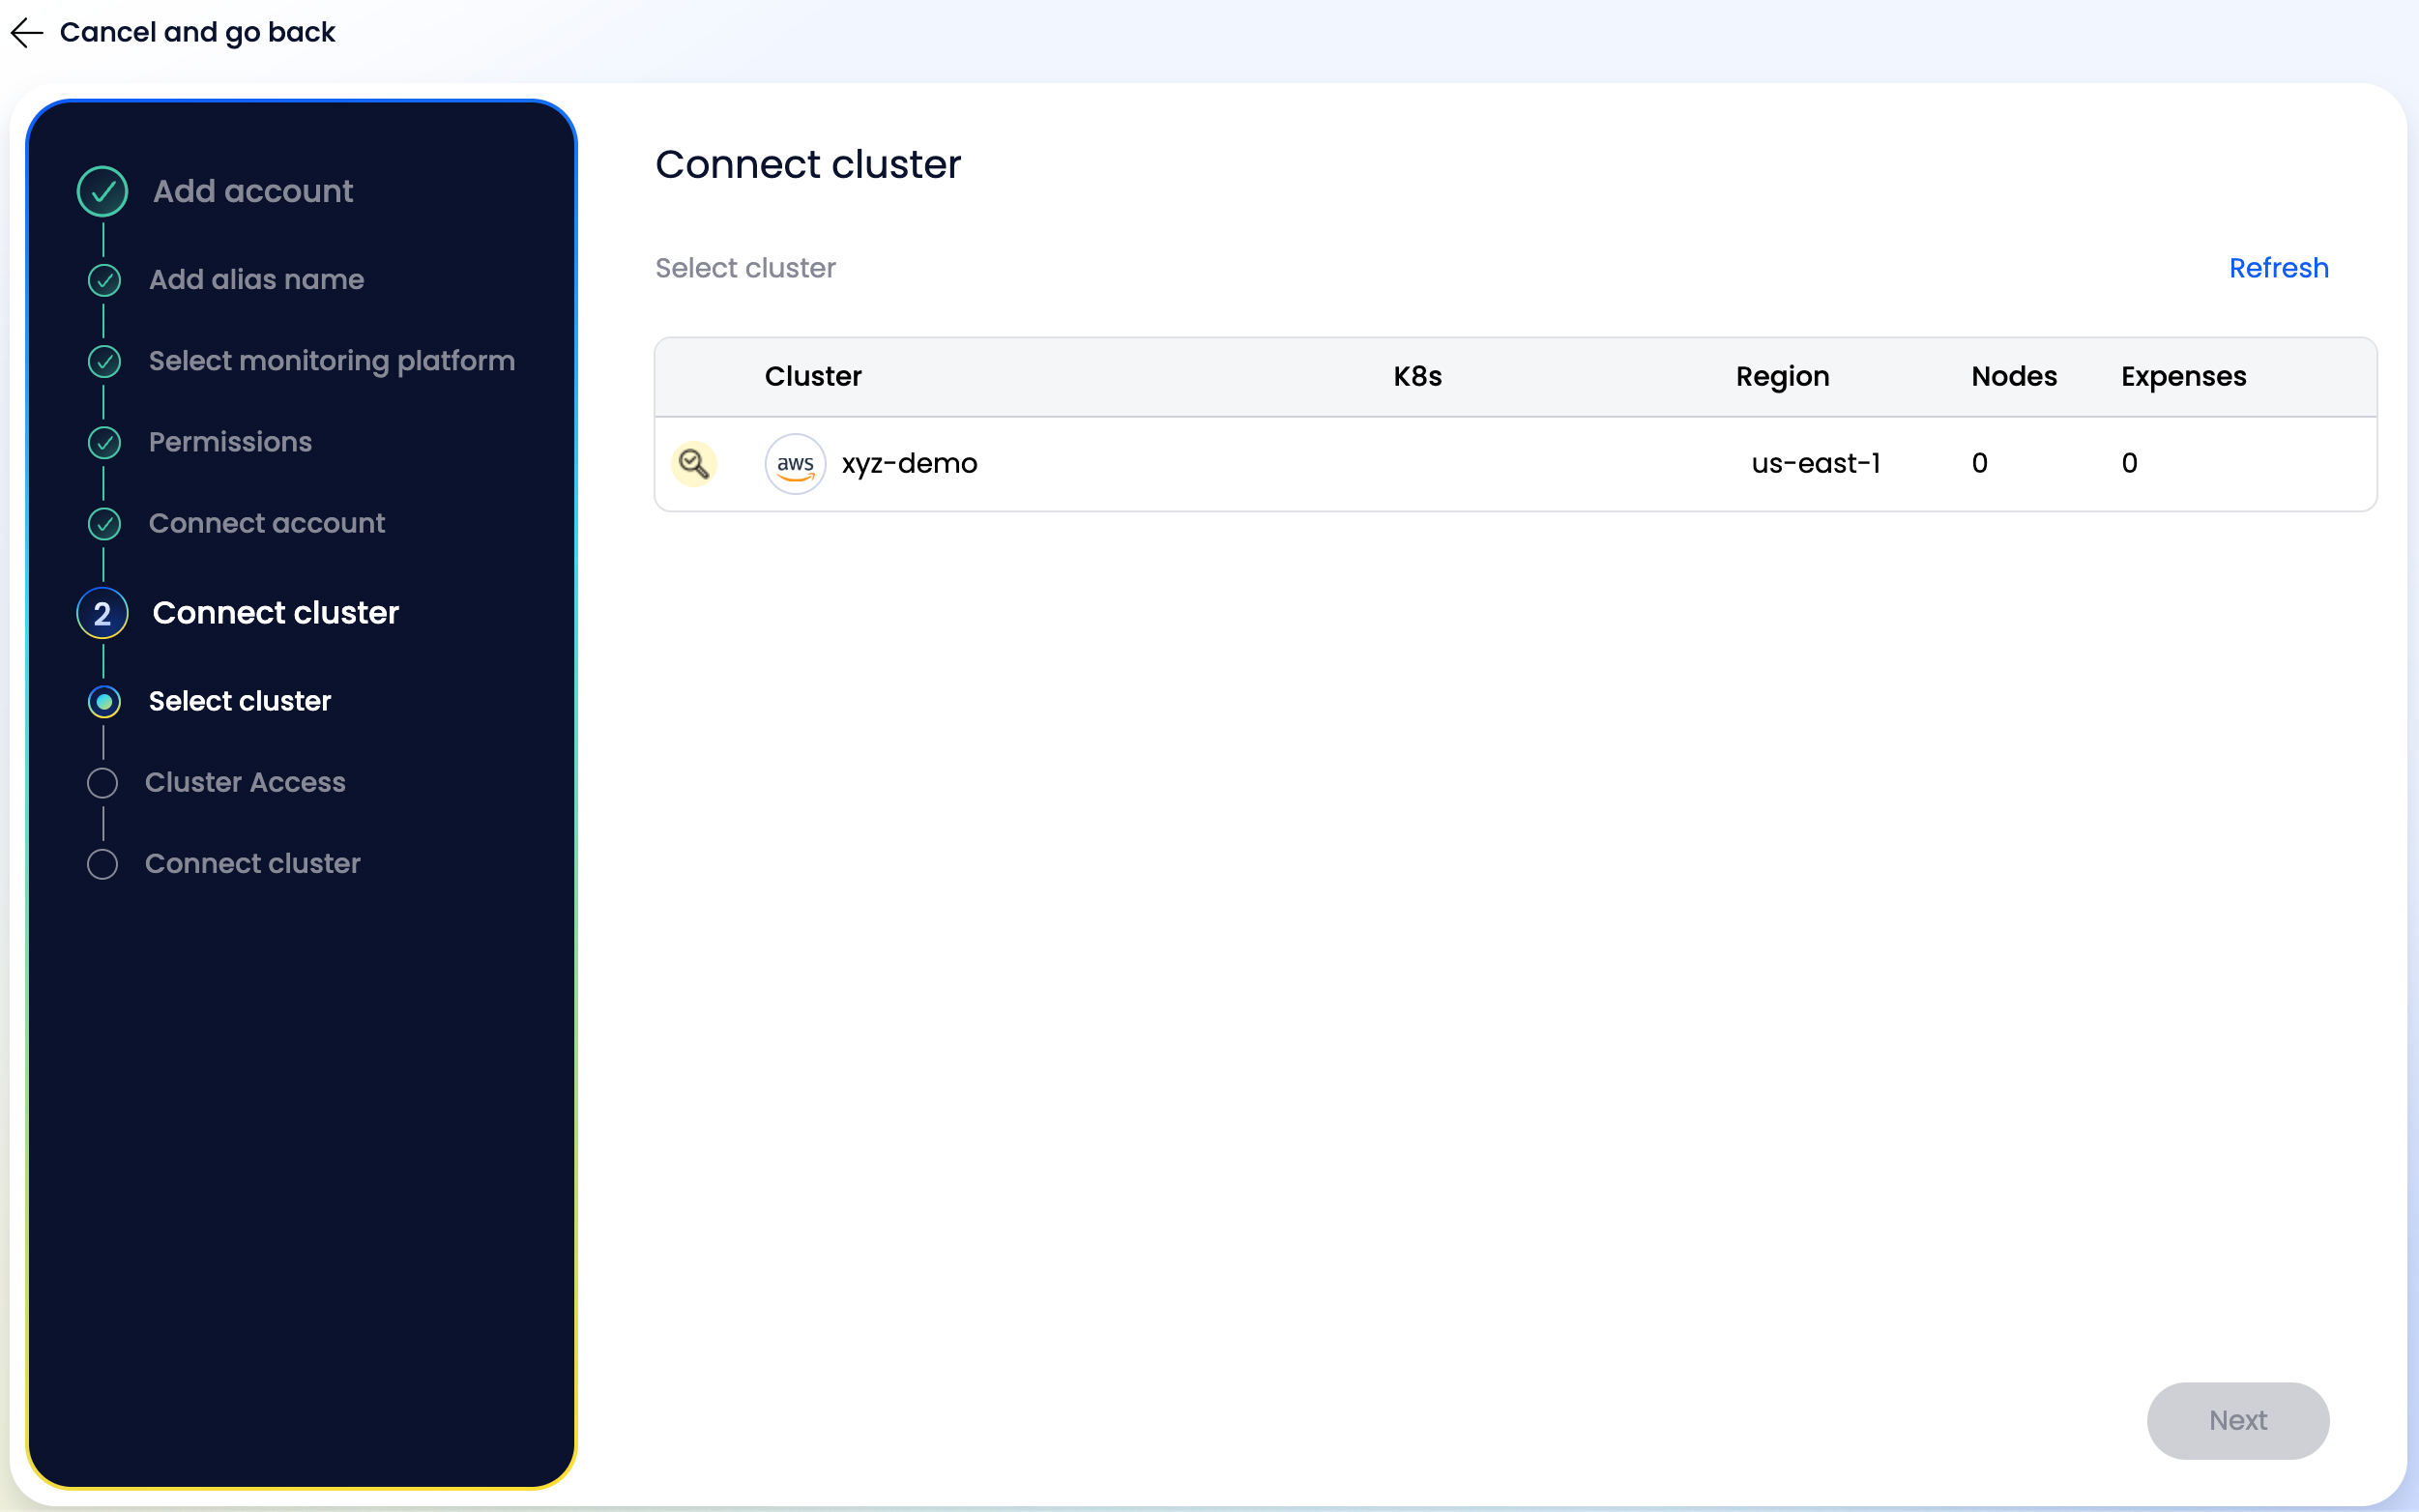
Step 2: Connect Existing Cluster #
Once your account is connected, StackBooster will automatically discover your clusters:
Select Your Cluster #
- Review discovered clusters in the cluster list
- View cluster details: K8s version, region, nodes, and expenses
- Example:
xyz-democluster inus-east-1region
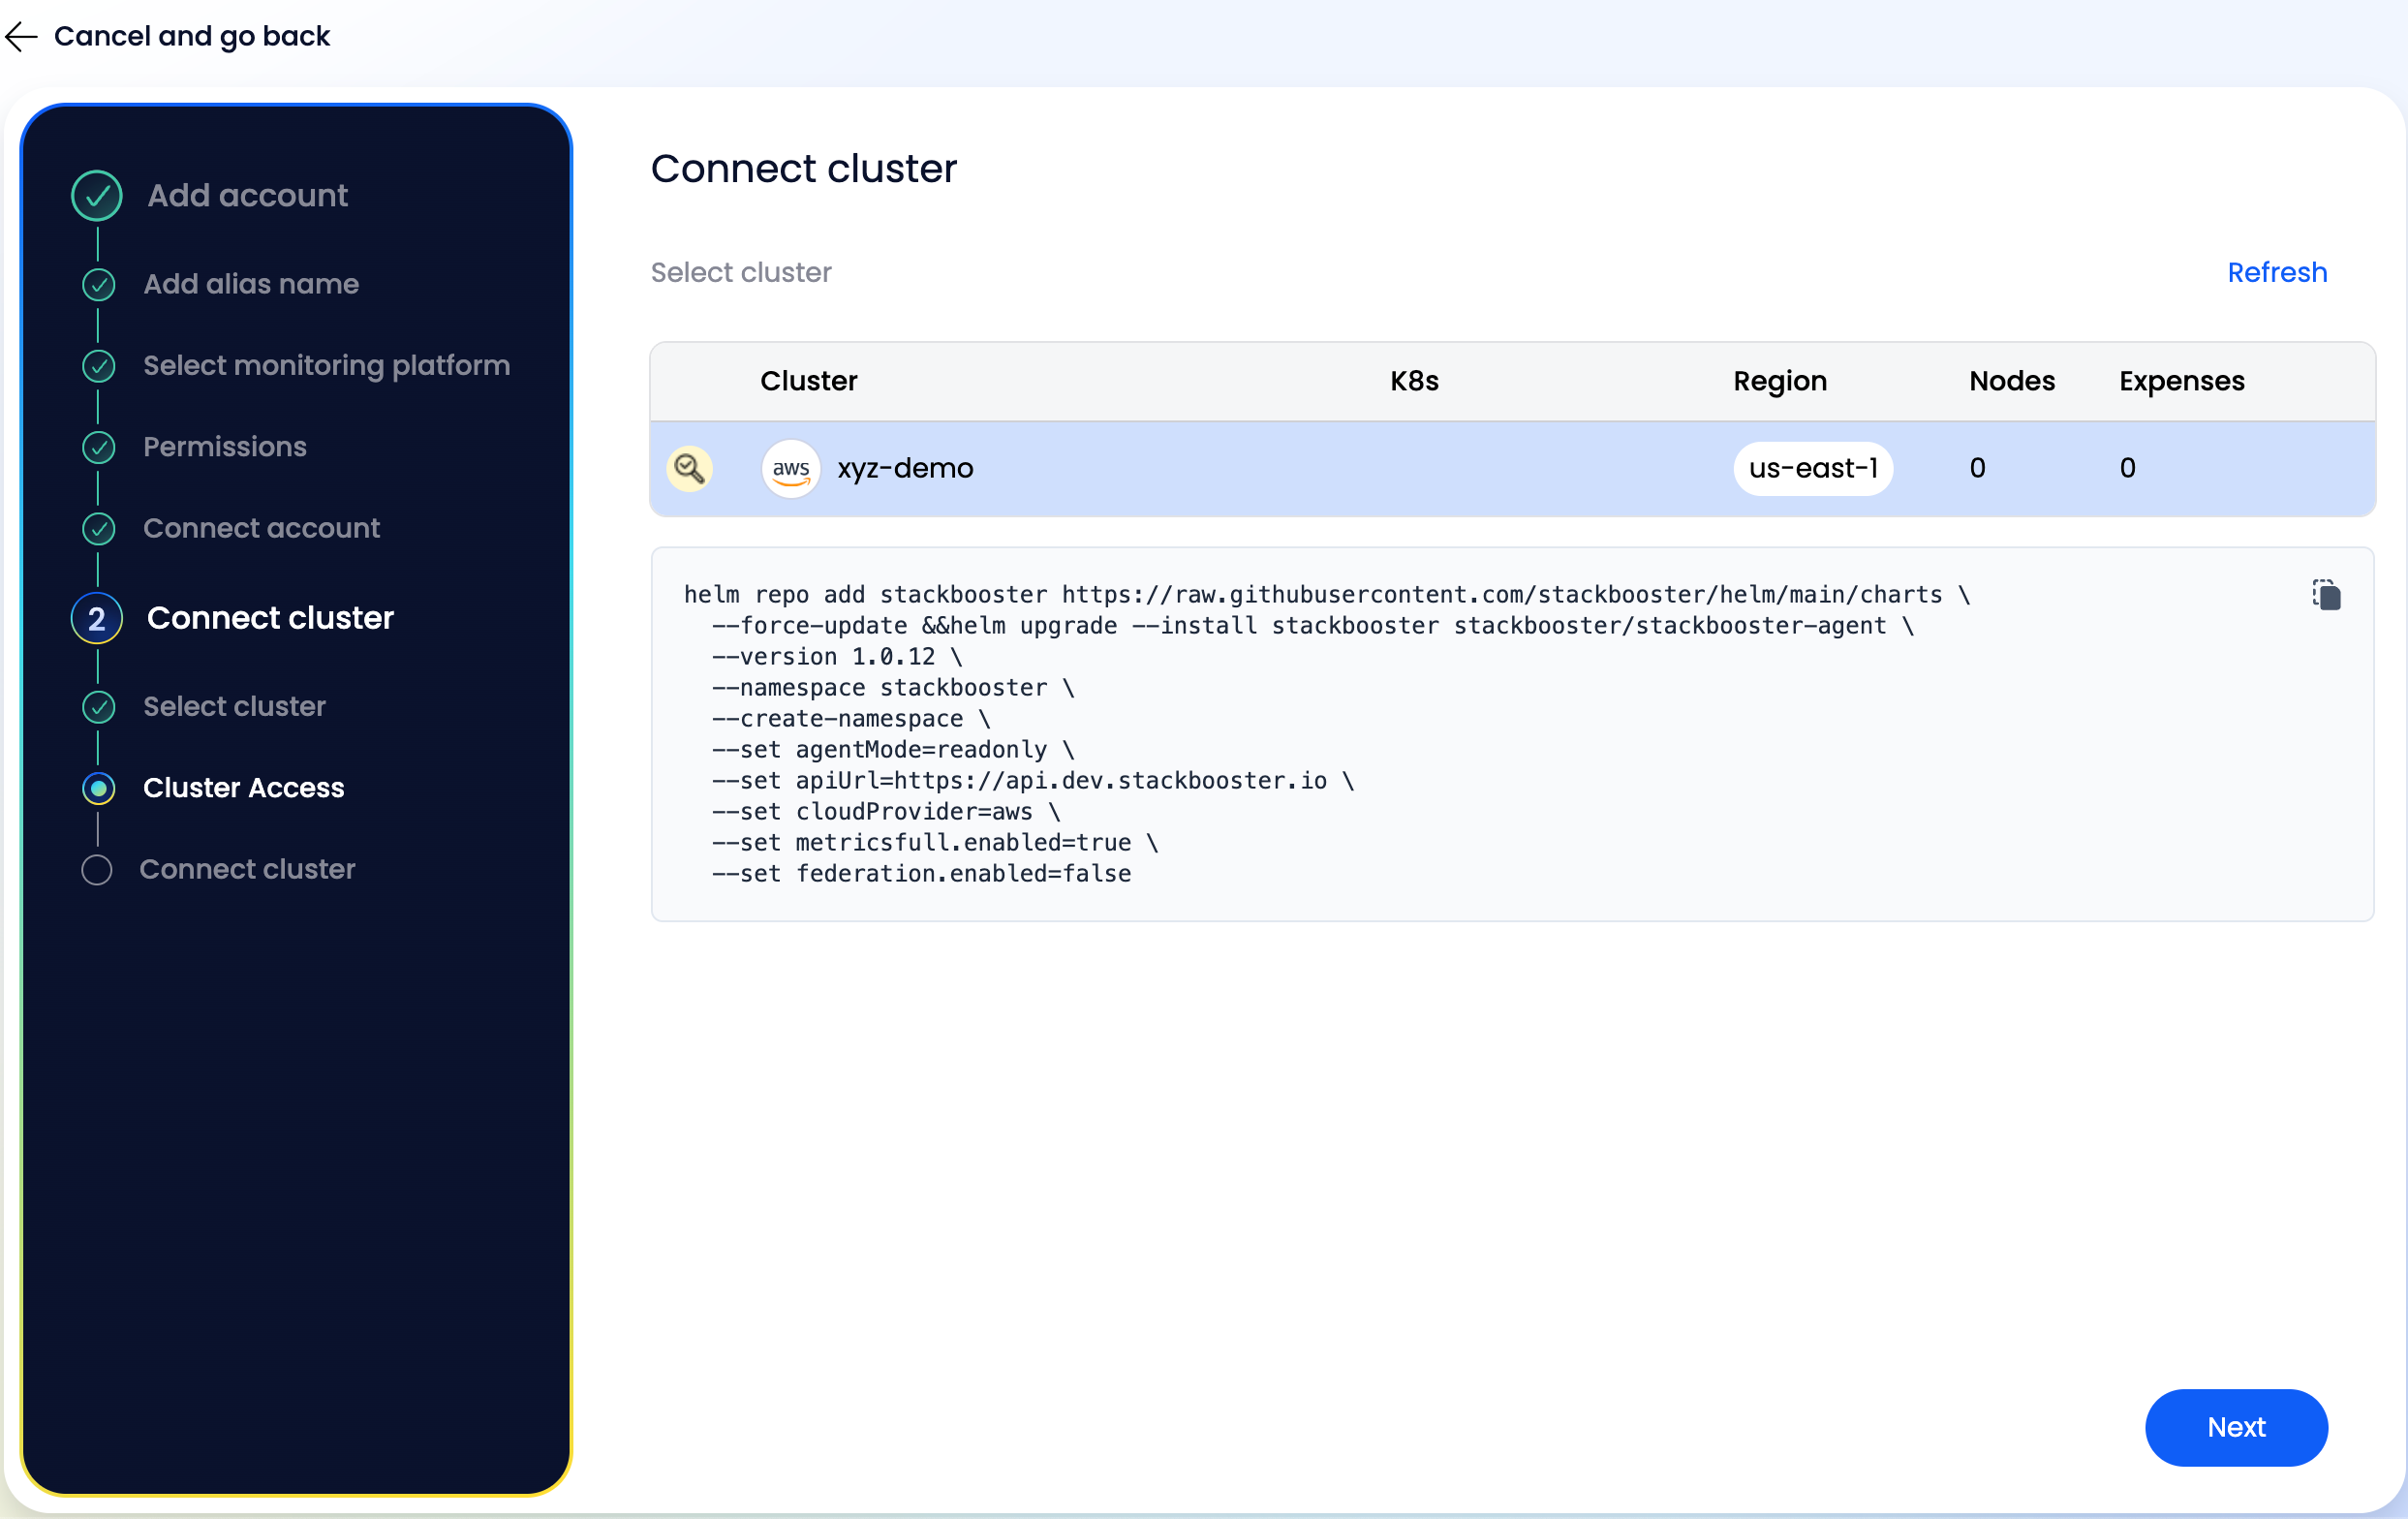
Step 3: Install StackBooster Agent #
Prerequisites #
Before you begin, ensure you have:
✅ Access to your Kubernetes cluster ✅ HELM package manager installed (v3.0+) ✅ kubectl configured with cluster admin permissions
Agent Installation #
After selecting your cluster, you’ll receive a Helm installation command:
- Copy the generated Helm command (use the copy button)
- Example command structure:
helm repo add stackbooster https://raw.githubusercontent.com/stackbooster/helm/main/charts \
  --force-update &&
helm upgrade --install stackbooster stackbooster/stackbooster-agent \
  --version 1.0.12 \
  --namespace stackbooster \
  --create-namespace \
  --set agentMode=readonly \
  --set apiUrl=https://api.dev.stackbooster.io \
  --set cloudProvider=aws \
  --set metricsfull.enabled=true \
  --set federation.enabled=false
- Open your terminal with kubectl access to your cluster
- Paste and execute the Helm command
- Click “Next” button
Step 4: Wait for Connection #
- DO NOT close the browser tab
- The system will wait while Helm deploys the agent
- This typically takes 5-10 minutes
- You’ll be automatically redirected when complete
✅ Post-Connection Steps #
Access Your Dashboard #
Once connected, you’ll be redirected to the main StackBooster interface where you can:
- View cluster health metrics
- Analyze resource utilization
- Review AI-powered optimization suggestions
- Monitor cost-saving opportunities
What Happens Next? #
- 10-15 minutes: Full agent initialization
- Immediate access: Most StackBooster features available
- Read-only mode: No changes made to your cluster
- Auto-discovery: Automatic detection of existing clusters
🔍 Verification #
To verify successful connection:
- Check Helm deployment status:
helm list -n stackbooster
kubectl get pods -n stackbooster
- All pods should be in
Runningstate - The StackBooster dashboard should display your cluster
🆘 Troubleshooting #
Connection Issues? #
- Ensure kubectl has cluster-admin permissions
- Verify Helm v3+ is installed:
helm version - Check firewall allows outbound HTTPS to
api.stackbooster.io
Need Help? #
- Check pod logs:
kubectl logs -n stackbooster -l app=stackbooster-agent - Review events:
kubectl get events -n stackbooster
🎯 Next Steps #
After successful connection:
- Explore Dashboard: Navigate through cluster insights
- Review Suggestions: Check AI-powered optimization recommendations
- Plan Optimizations: Identify quick wins for cost and performance
- Upgrade Options: Consider full agent mode for automated optimizations
Time to Complete: ~10 minutes Cluster Impact: Read-only discovery mode Required Permissions: Cluster admin for Helm installation