StackBooster Read-Only Cluster Connection #
Quick Start Guide #
Prerequisites #
Before you begin, ensure you have:
- ✅ Access to your Kubernetes cluster
- ✅ HELM package manager installed (v3.0+)
- ✅ kubectl configured with cluster admin permissions
- ✅ 5 minutes to complete the setup
🚀 Connection Steps #
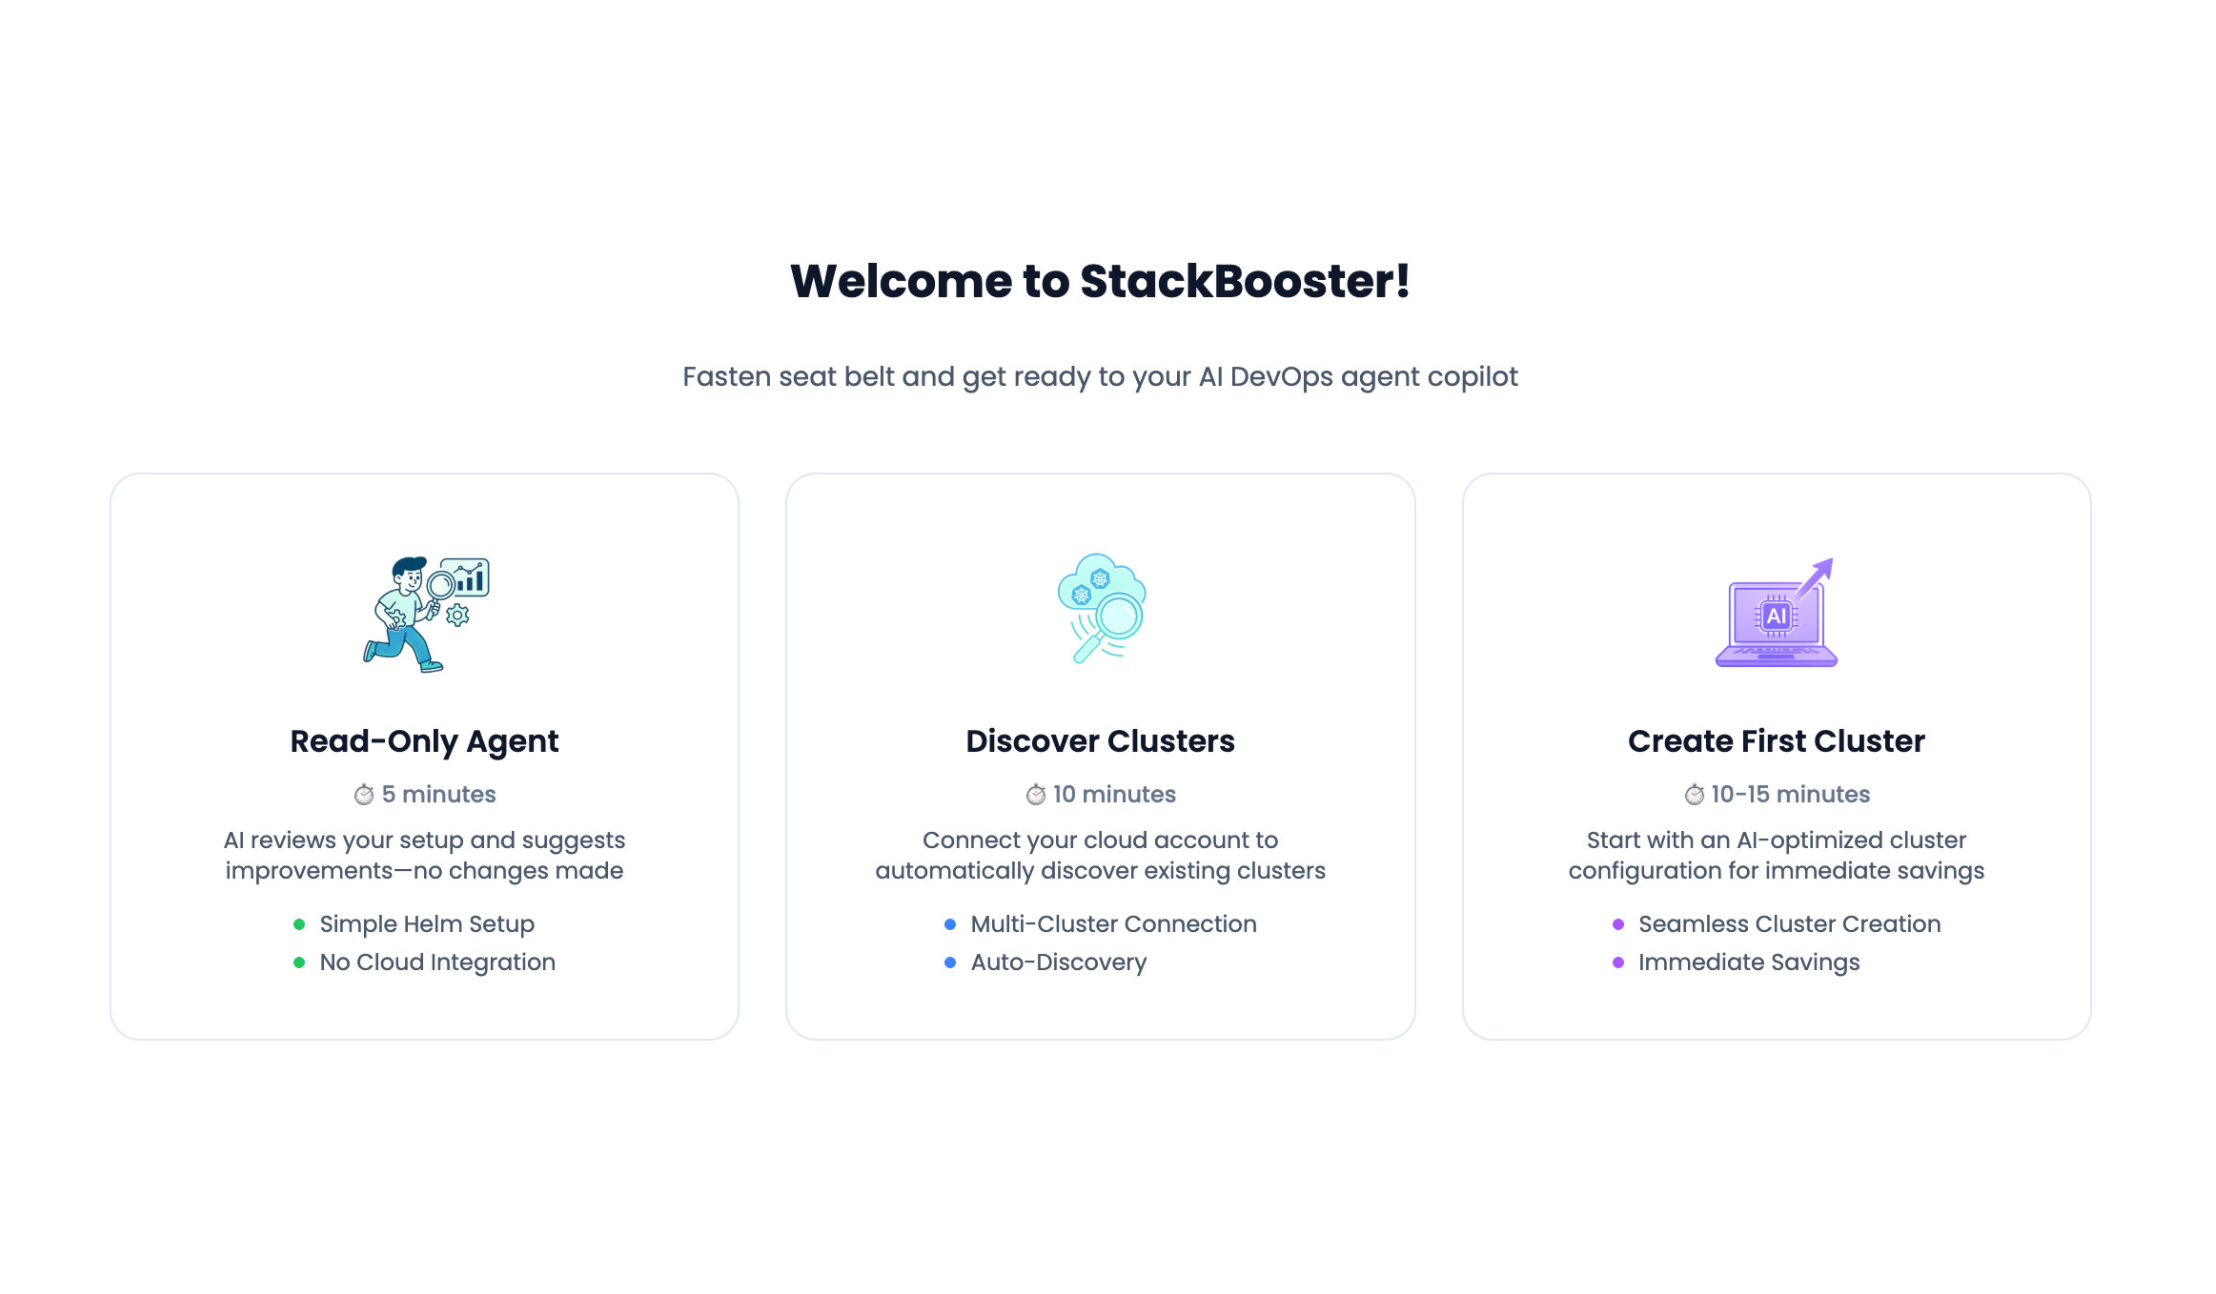
Step 1: Choose Read-Only Agent #
From the StackBooster welcome screen, select “Read-Only Agent” (5 minutes setup time).
- No changes are made to your cluster
- Simple Helm setup with no cloud integration required
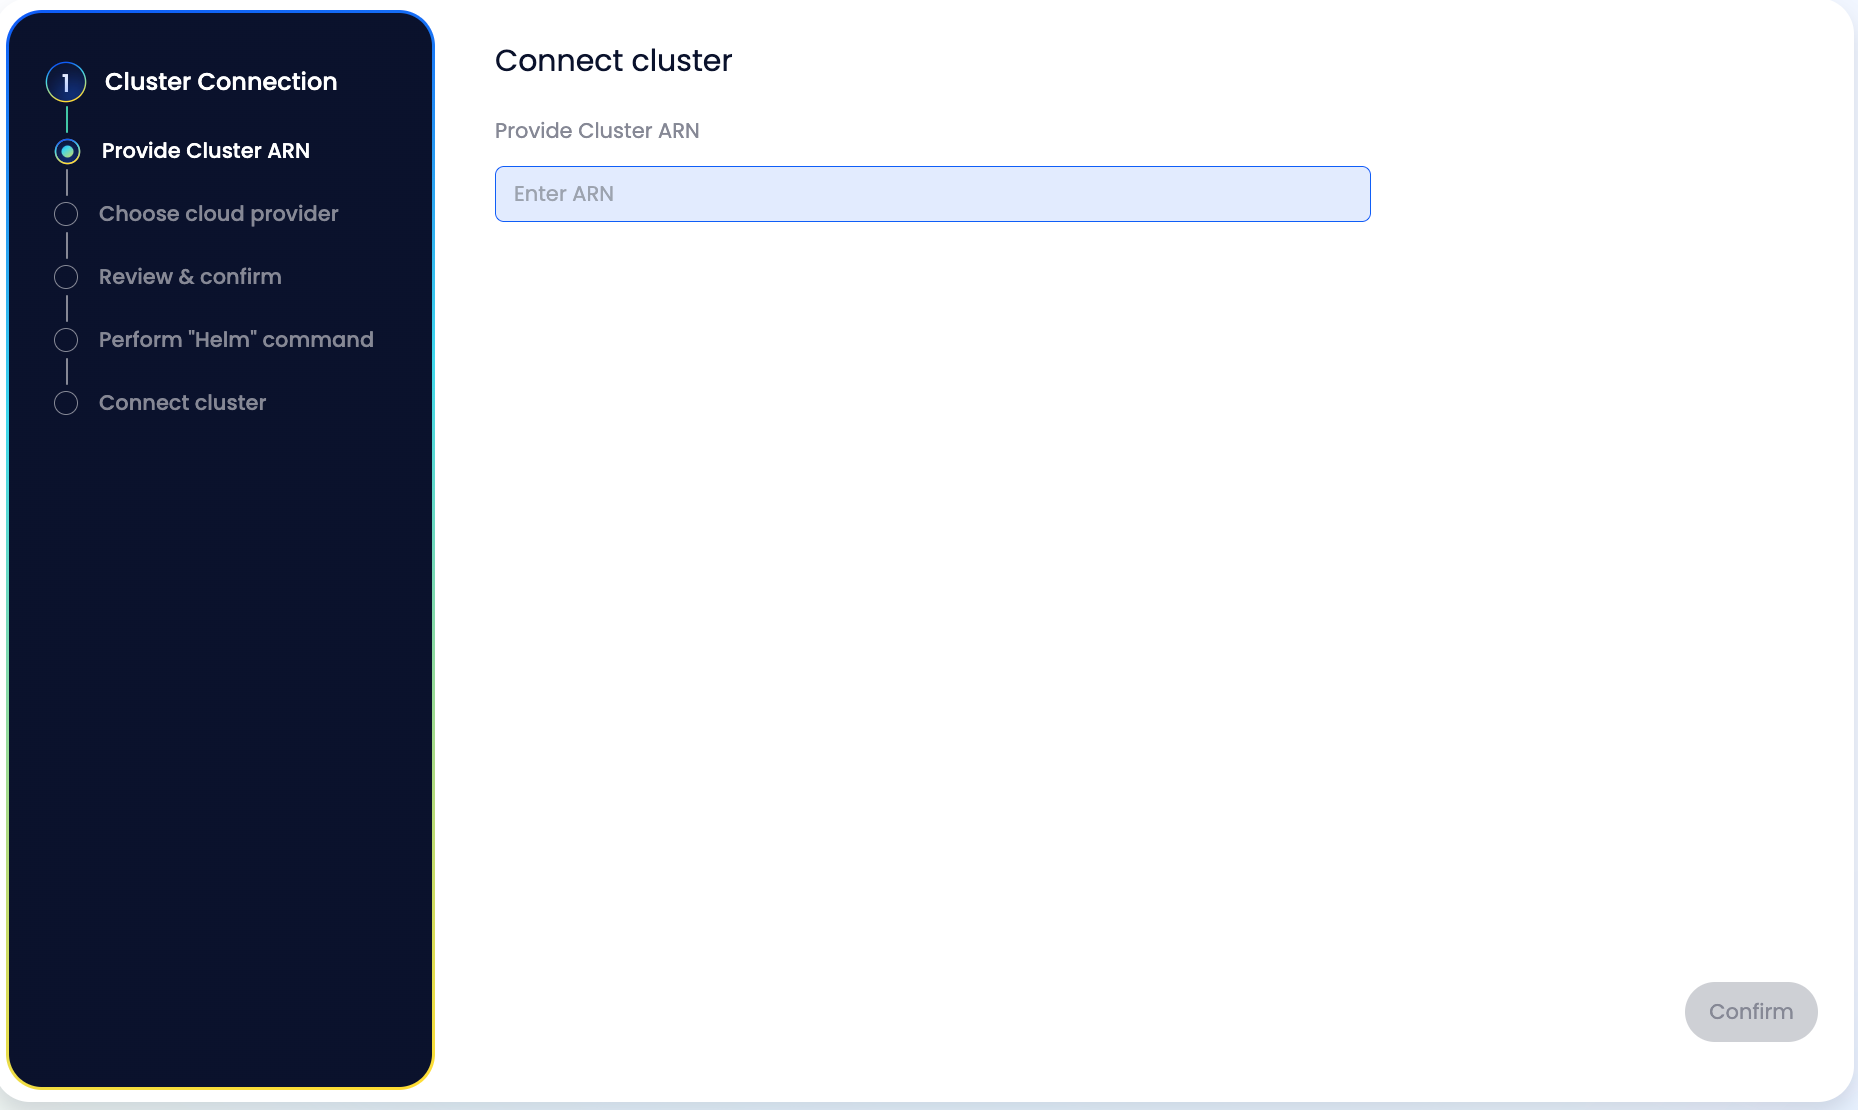
Step 2: Provide Cluster ARN #
Enter a ARN of cluster that you want to connect. You can copy it in your AWS Console.
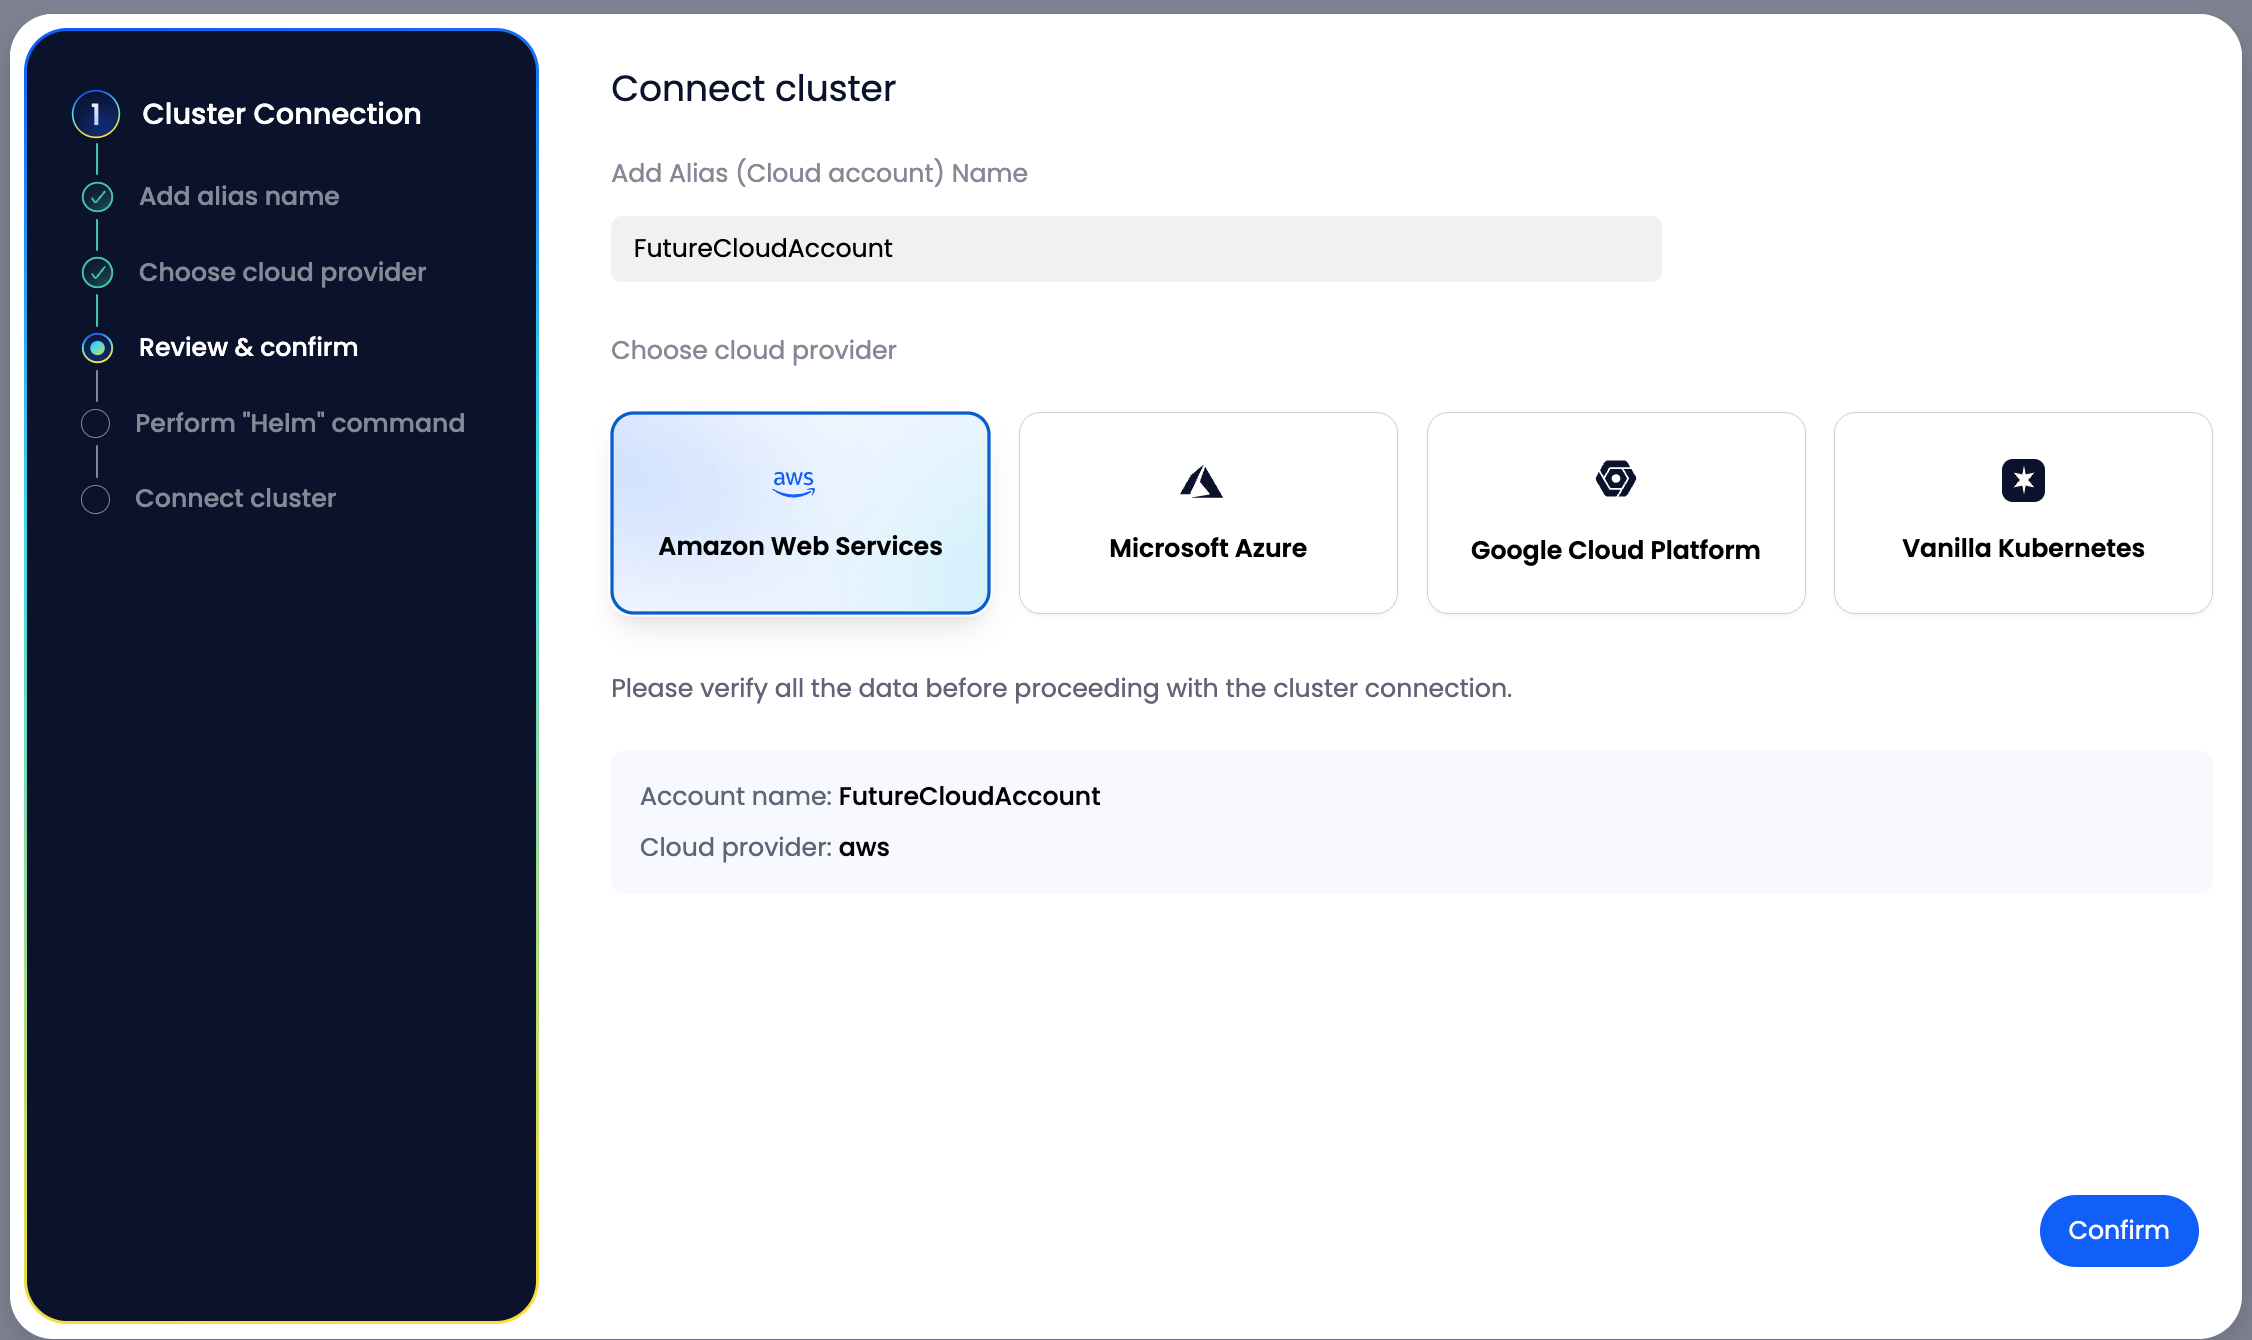
Step 3: Select Cloud Provider #
Choose your cloud platform:
- AWS (Amazon Web Services) — Only avalible now
- Microsoft Azure
- Google Cloud Platform
- Vanilla Kubernetes
Step 4: Review Configuration #
Verify your settings:
- Account name:
FutureCloudAccount - Cloud provider:
aws(or your selection) - Click “Confirm” to proceed
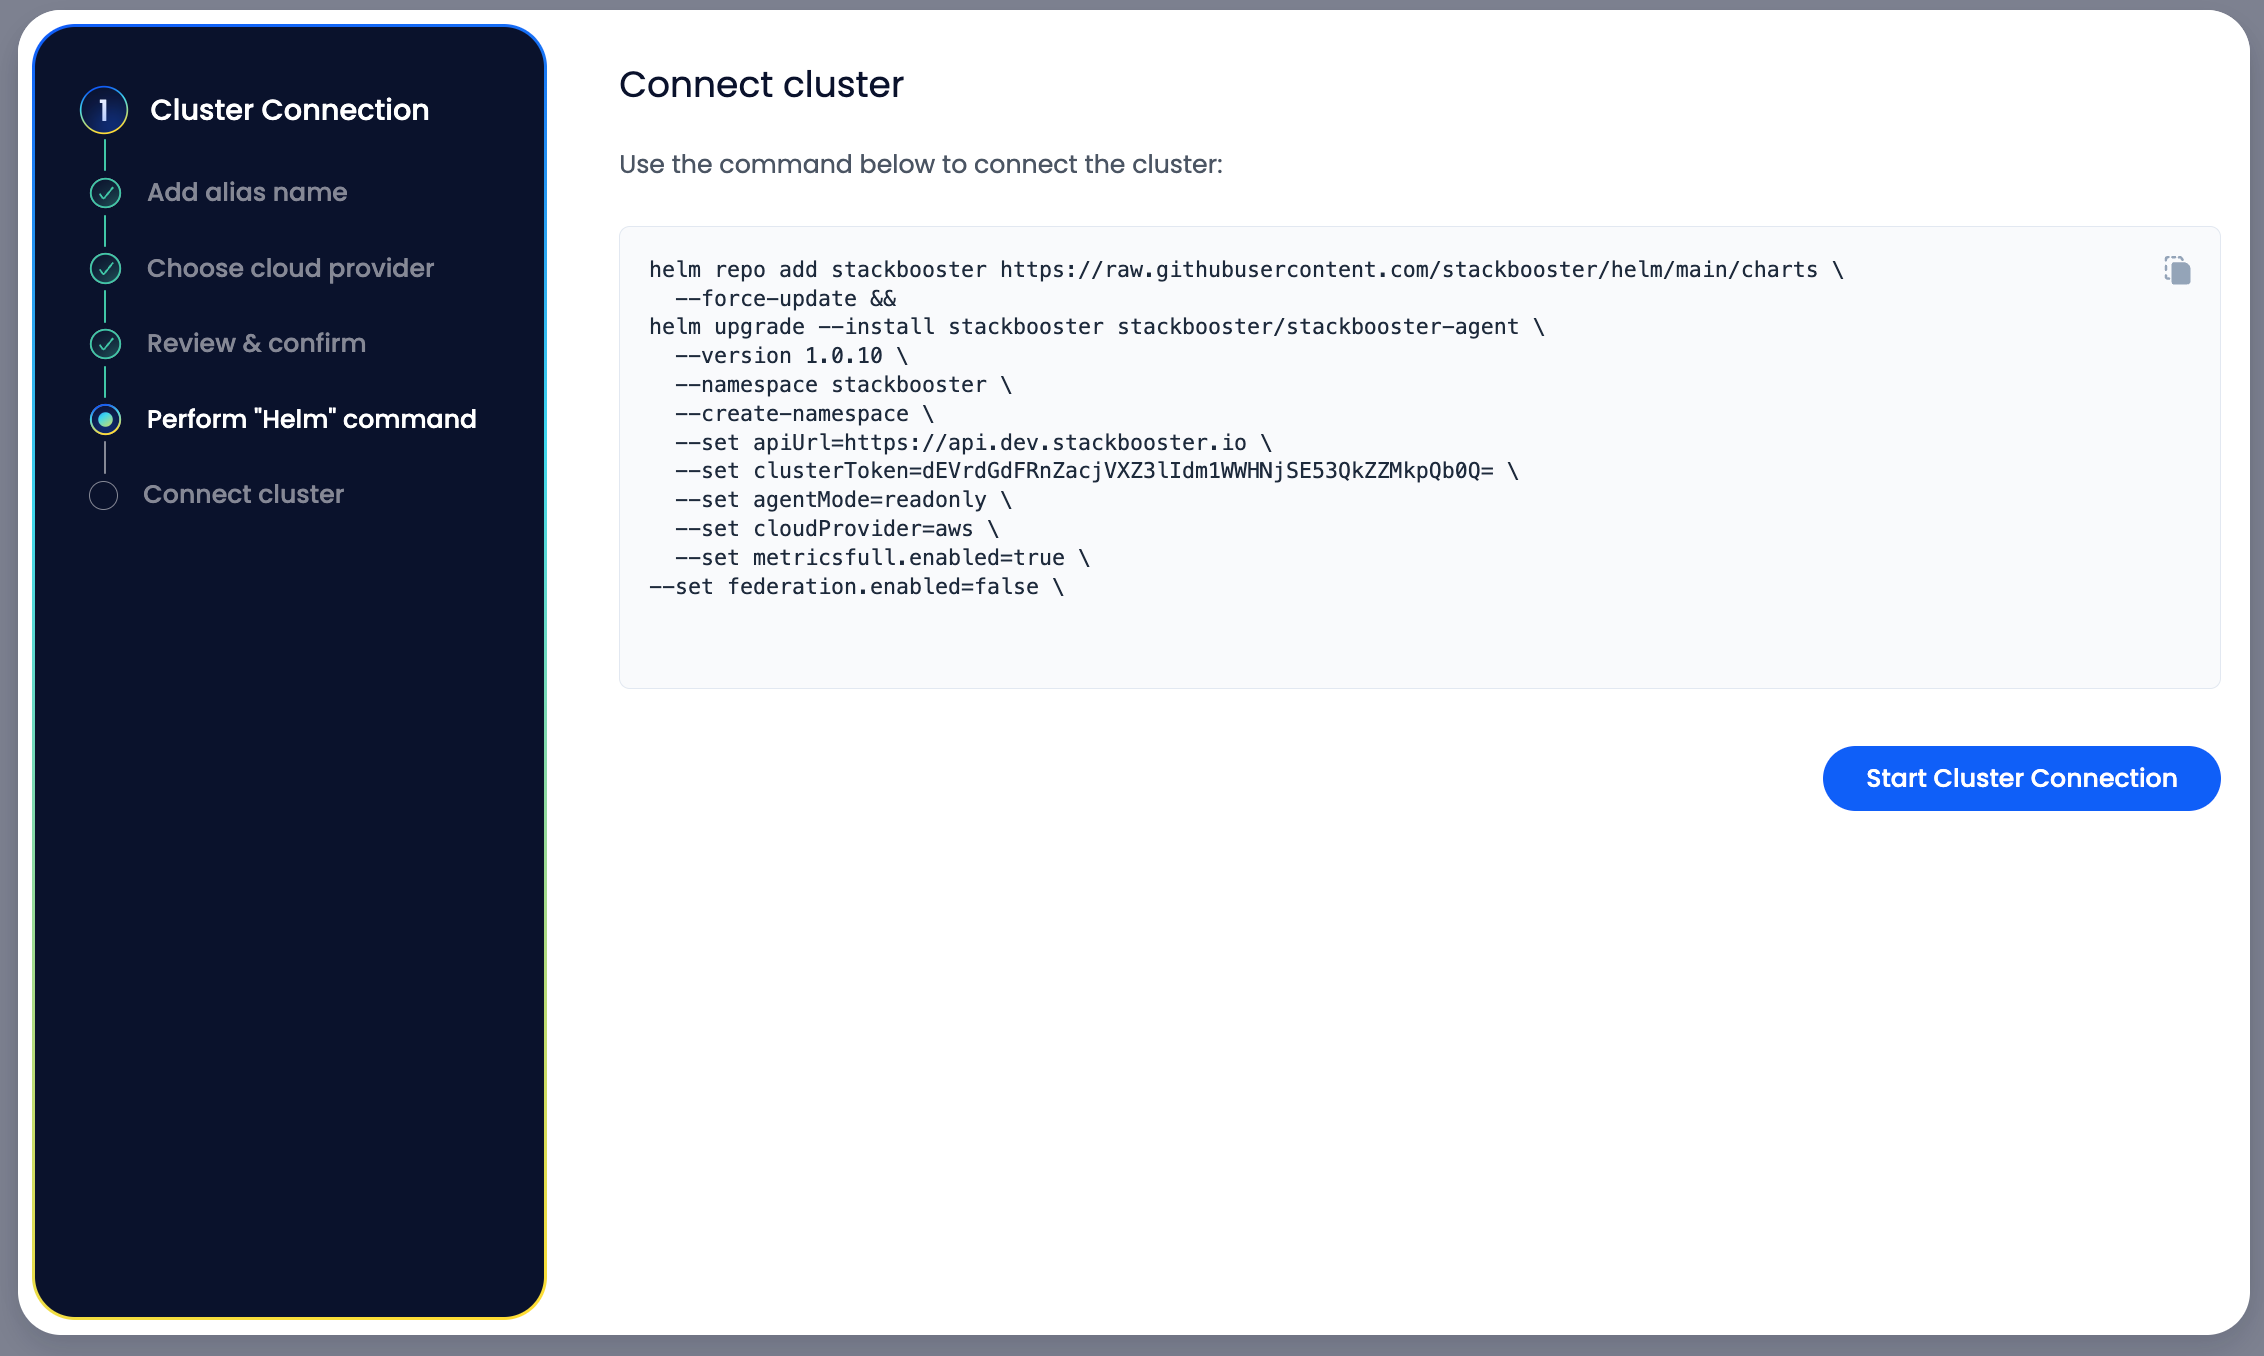
Step 5: Copy & Execute Helm Command #
- Copy the generated Helm command (use the copy button)
- Example command structure:
helm repo add stackbooster https://raw.githubusercontent.com/stackbooster/helm/main/charts \
  --force-update &&
helm upgrade --install stackbooster stackbooster/stackbooster-agent \
  --version 1.0.11 \
  --namespace stackbooster \
  --create-namespace \
  --set clusterToken=<YOUR_UNIQUE_TOKEN> \
  --set clusterArn=<YOUR_CLUSTER_ARN> \
  --set agentMode=readonly \
  --set cloudProvider=aws \
  --set metricsfull.enabled=true \
  --set federation.enabled=false
- Open your terminal with kubectl access to your cluster
- Paste and execute the Helm command
- Click “Start Cluster Connection” button
Step 6: Wait for Connection #
- DO NOT close the browser tab
- The system will wait while Helm deploys the agent
- This typically takes 5-10 minutes
- You’ll be automatically redirected when complete
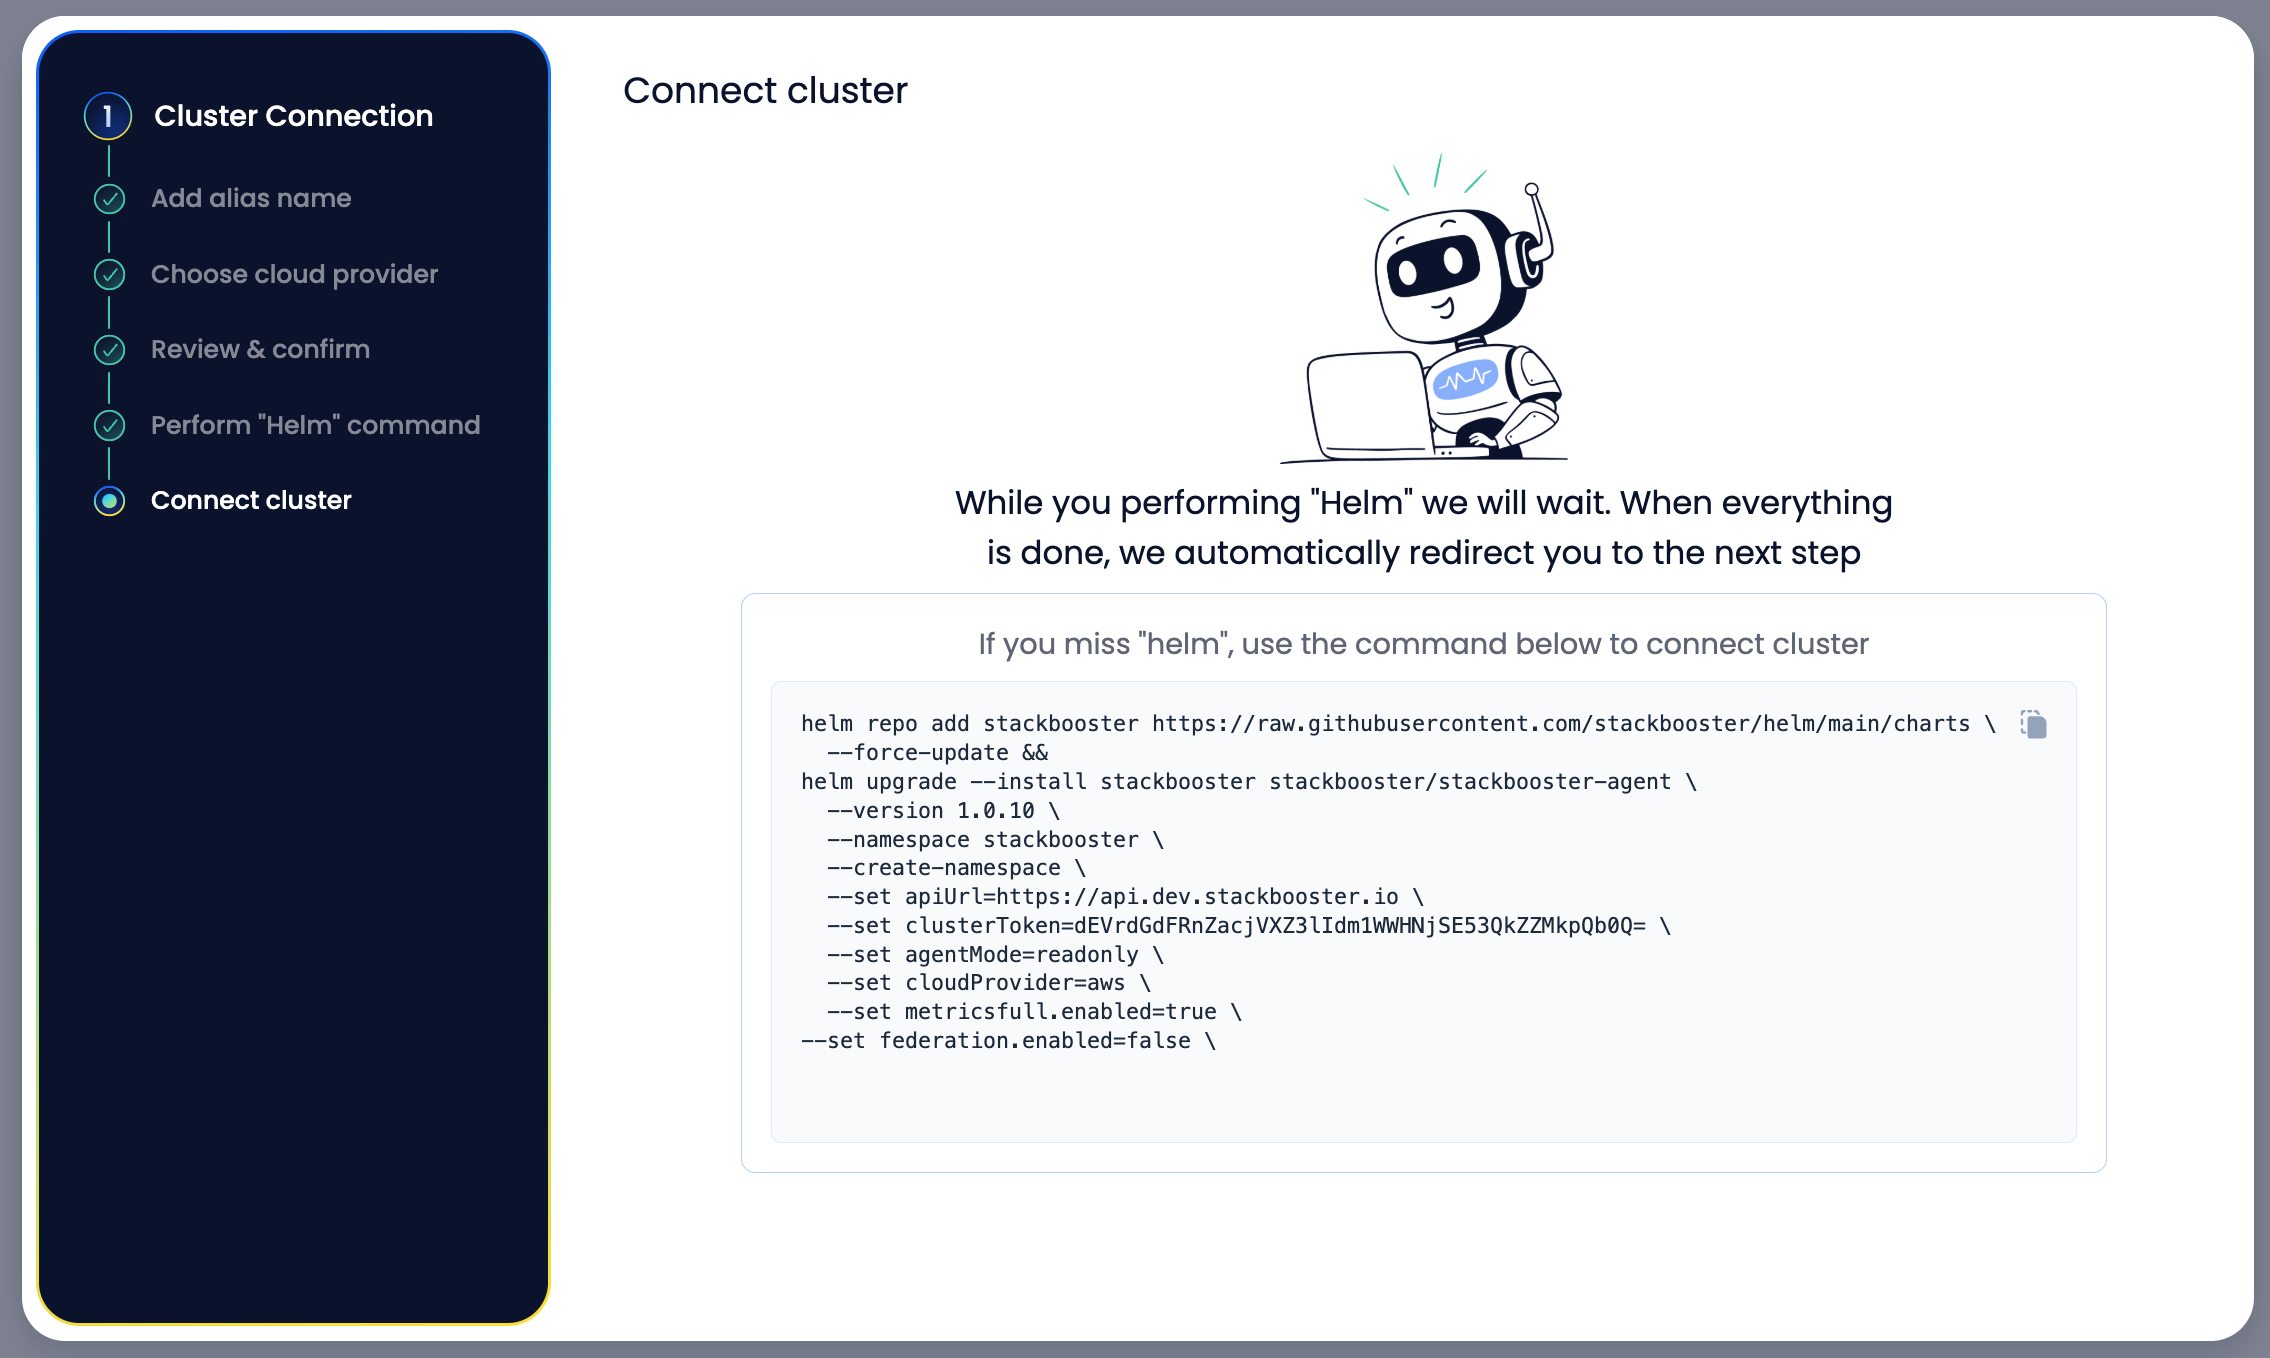
Step 7: Alternative Connection (if needed) #
If you miss the initial Helm execution, use the backup command provided:
helm repo add stackbooster https://raw.githubusercontent.com/stackbooster/helm/main/charts \
  --force-update &&
helm upgrade --install stackbooster stackbooster/stackbooster-agent \
  --version 1.0.11 \
  --namespace stackbooster \
  --create-namespace \
  --set clusterToken=<YOUR_UNIC_TOKEN> \
  --set clusterArn=<YOUR_CLUSTER_ARN> \
  --set agentMode=readonly \
  --set cloudProvider=aws \
  --set metricsfull.enabled=true \
  --set federation.enabled=false
✅ Post-Connection Steps #
Access Your Dashboard #
Once connected, you’ll be redirected to the main StackBooster interface where you can:
- View cluster health metrics
- Analyze resource utilization
- Review AI-powered optimization suggestions
- Monitor cost-saving opportunities
What Happens Next? #
- 10-15 minutes: Full agent initialization
- Immediate access: Most StackBooster features available
- Read-only mode: No changes made to your cluster
- Auto-discovery: Automatic detection of existing clusters
🔍 Verification #
To verify successful connection:
- Check Helm deployment status:
helm list -n stackbooster
kubectl get pods -n stackbooster
- All pods should be in
Runningstate - The StackBooster dashboard should display your cluster
📊 Features Available in Read-Only Mode #
- Cluster Analysis: Complete visibility into resource usage
- Cost Optimization: Identify savings opportunities
- Multi-Cluster View: Connect and monitor multiple clusters
- No Risk: Zero changes to your existing infrastructure
🆘 Troubleshooting #
Connection Issues? #
- Ensure kubectl has cluster-admin permissions
- Verify Helm v3+ is installed:
helm version - Check firewall allows outbound HTTPS to
api.stackbooster.io
Need Help? #
- Check pod logs:
kubectl logs -n stackbooster -l app=stackbooster-agent - Review events:
kubectl get events -n stackbooster
🎯 Next Steps #
After successful connection:
- Explore Dashboard: Navigate through cluster insights
- Review Suggestions: Check AI-powered optimization recommendations
- Plan Optimizations: Identify quick wins for cost and performance
- Upgrade Options: Consider full agent mode for automated optimizations
Time to Complete: ~5 minutes Cluster Impact: None (read-only) Required Permissions: Cluster admin for Helm installation