Create the new EKS Cluster #
This guide details the steps to create an Amazon EKS cluster directly from the Stackbooster Console, enabling seamless management and monitoring of your Kubernetes workloads.
Prerequisites #
Before you begin, ensure you have completed the following prerequisites:
Connect your AWS Account
Ensure your AWS account is connected to Stackbooster. Refer to the Connect Your AWS Account Guide.Check the AWS Account Quotas
Verify that your AWS account has the necessary quotas to create EKS clusters. See the Prepare AWS Account Quotas Guide.Install AWS CLI
Ensure you have installed the AWS CLI on your workstation. If not, follow the instructions.Install kubectl
Confirm thatkubectl, the command-line tool for interacting with Kubernetes clusters, is installed. If not, follow the instructions.Install Helm Helm is a popular package manager for Kubernetes. It is required to install the Stackbooster agents. To install Helm, follow the official Helm installation guide. Once Helm is installed, confirm that it is available by running:
helm version
Steps to Create an EKS Cluster #
Step 1: Navigate to the Clusters Section #
- Log in to the Stackbooster Console.
- In the main navigation menu, select the Clusters section.
- Click the Add New button to initiate the cluster creation process.
Step 2: Configure Cluster Parameters #
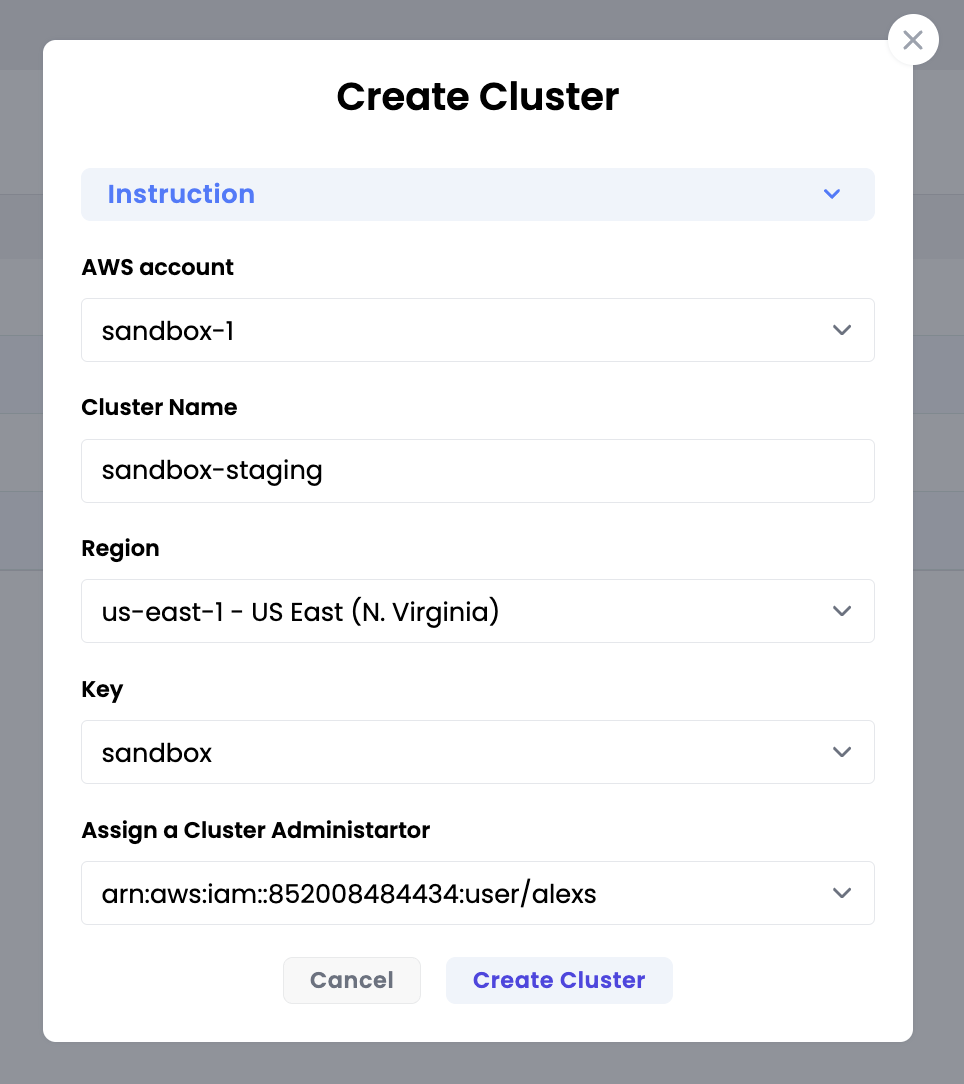
In the popup window, configure the following parameters:
- AWS Account: Select the AWS account from the dropdown list. This option is available if you have multiple AWS accounts connected to Stackbooster.
- Cluster Name: Enter a unique name for your cluster, e.g., “development”. The cluster name must be unique within your AWS account.
- Region: Choose the region for your cluster deployment.
- SSH Key Name (Optional): Select the SSH key name from your AWS EC2 key pairs. This key will be added to the machines launched by Stackbooster.
- IAM User: Choose the IAM role ARN that will be granted administrative privileges in the cluster. This field is required.

Step 3: Create the Cluster #
- After configuring the parameters, click the Create button.
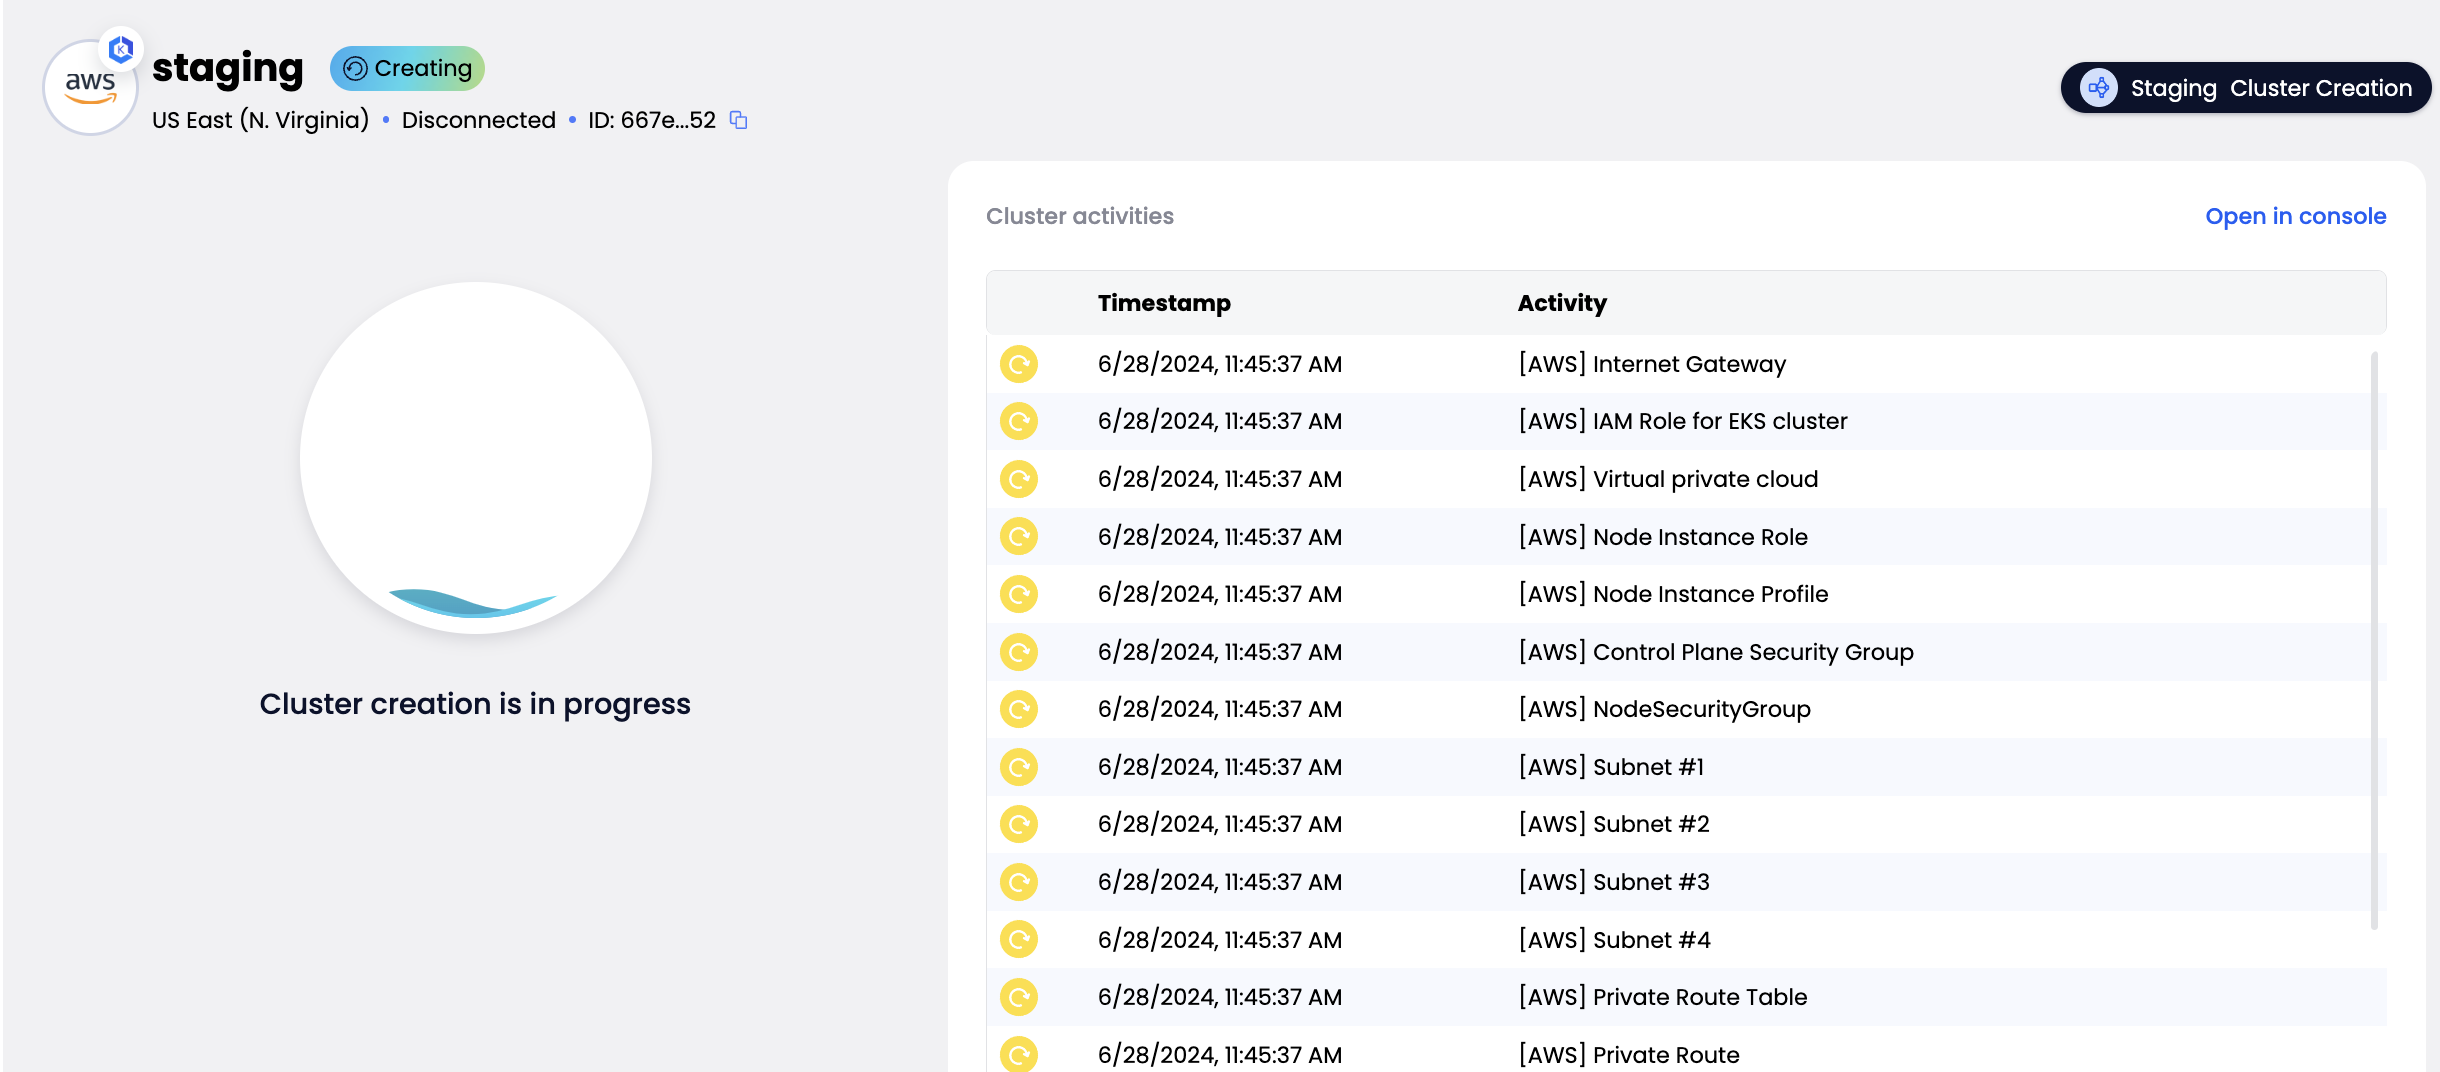
- You will be redirected to a screen displaying the current progress and resource creation status. Cluster provisioning typically takes 10-20 minutes.

Step 4: Install Stackbooster Agents #
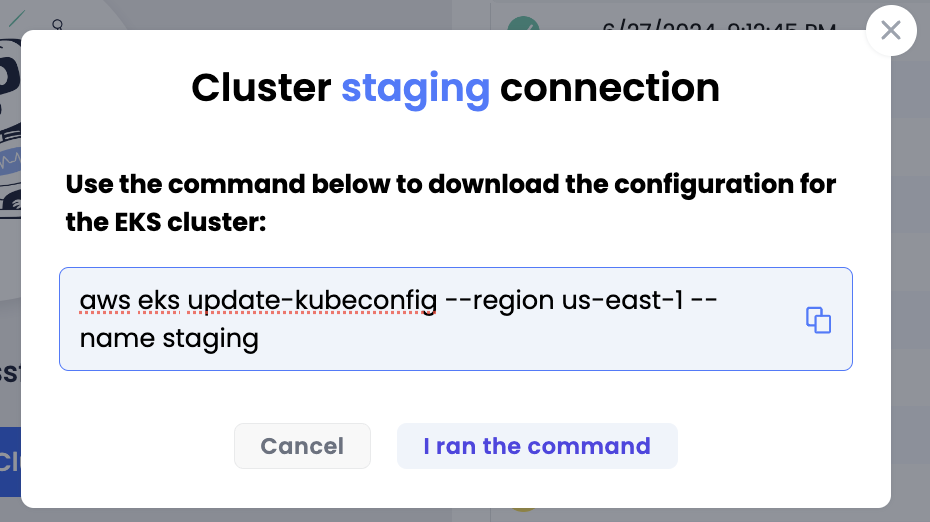
Click Connect
Once the cluster is provisioned, click the Connect Cluster button in the Stackbooster interface.Download the connection script
A download link for a connection script (macOS/Linux or Windows) will be provided. Download this script to your workstation.

Run the script
- macOS/Linux:
chmod +x connect_cluster_command.sh ./connect_cluster_command.sh - Windows (PowerShell or Command Prompt):
connect_cluster_command.bat
Script prompts:
- AWS CLI Profile: Provide the AWS profile name or press Enter to use
default. - Role ARN: If needed, specify an IAM role ARN to assume; otherwise, press Enter to skip.
- Cluster Configuration: The script runs
aws eks update-kubeconfigto configure your localkubeconfig. - Install Agents: The script uses Helm to install the Stackbooster agents:
helm install stackbooster stackbooster/stackbooster-agent --version 1.0.3 - Completion: The script will pause at the end so you can review any output.
- macOS/Linux:
Verify Installation
After the script finishes, run the following to confirm the agents are installed:kubectl get pods -n stackbooster
Step 5: Verify Cluster Status #
After installing the agents, the cluster status will change to “Active” in the clusters list. Note that some metrics will be displayed after a short period as Stackbooster collects the required information and performs the necessary analysis.