Connect Your AWS Account to Stackbooster #
To take advantage of Stackbooster’s optimization and cost savings features, you need to connect your AWS account to Stackbooster. Follow these steps to set up your account connection seamlessly.
Prerequisites #
Before you start, ensure you have the following:
- Make sure there is an IAM user in your AWS account who has credentials for both Console and Programmatic Access. If such a user doesn’t exist, you can create one by following the AWS guidelines, or you can contact your account administrator to get the required permissions.
- Access to the Stackbooster console with the necessary permissions to add accounts.
Step-by-Step Connection Process #
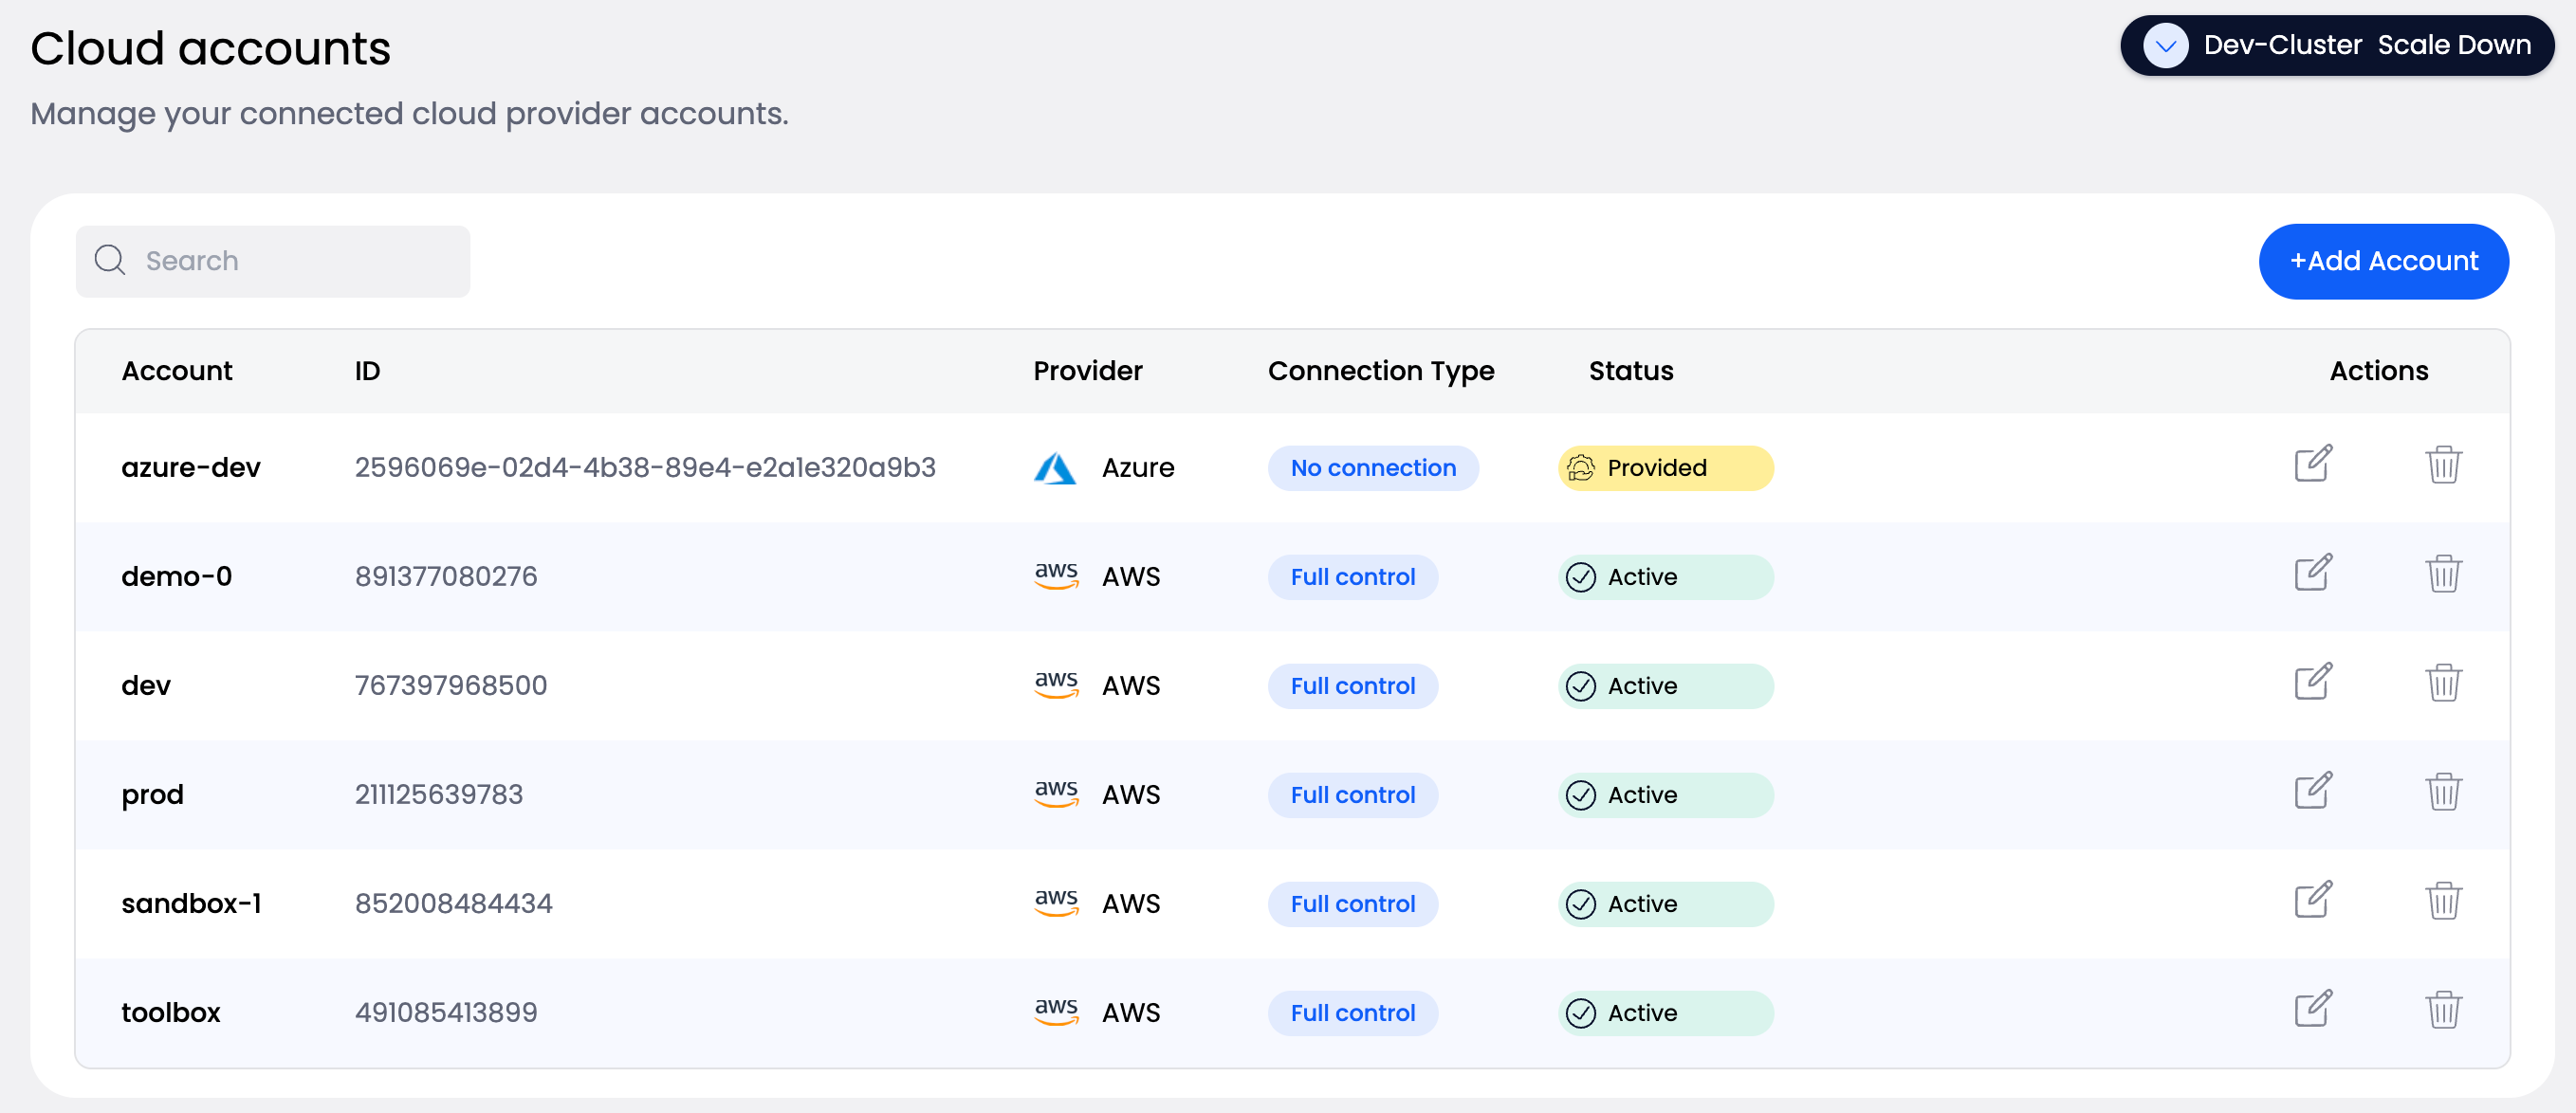
Step 1: Access the Cloud Accounts Page #
Navigate to the Cloud accounts section from the dashboard. Here you’ll see all your currently connected cloud provider accounts.
Step 2: Add a New Account #
Click the +Add Account button in the top right corner of the Cloud accounts page to begin adding a new cloud provider connection.
Step 3: Provide Account Information #
In the “Add account” dialog:
- Enter a descriptive Account name (e.g., “production”, “development”, “staging”) that will help you identify this account in StackBooster
- This name is for internal reference and will appear in your StackBooster dashboard
Step 4: Select Cloud Provider #
Choose your cloud platform from the available options. Currently, Amazon Web Services is available, with support for Microsoft Azure, Google Cloud Platform, and Vanilla Kubernetes coming soon.
Step 5: Choose Connection Type #
Select the appropriate permission level for your account:
- Read-Only Access (Discovery) - Recommended for initial setup. Allows StackBooster to discover your EKS clusters and resources without making changes
- Autoscaling Access - Enables StackBooster to automatically scale your resources
- Full Control (EKS Creation & Deletion) - Provides complete management capabilities
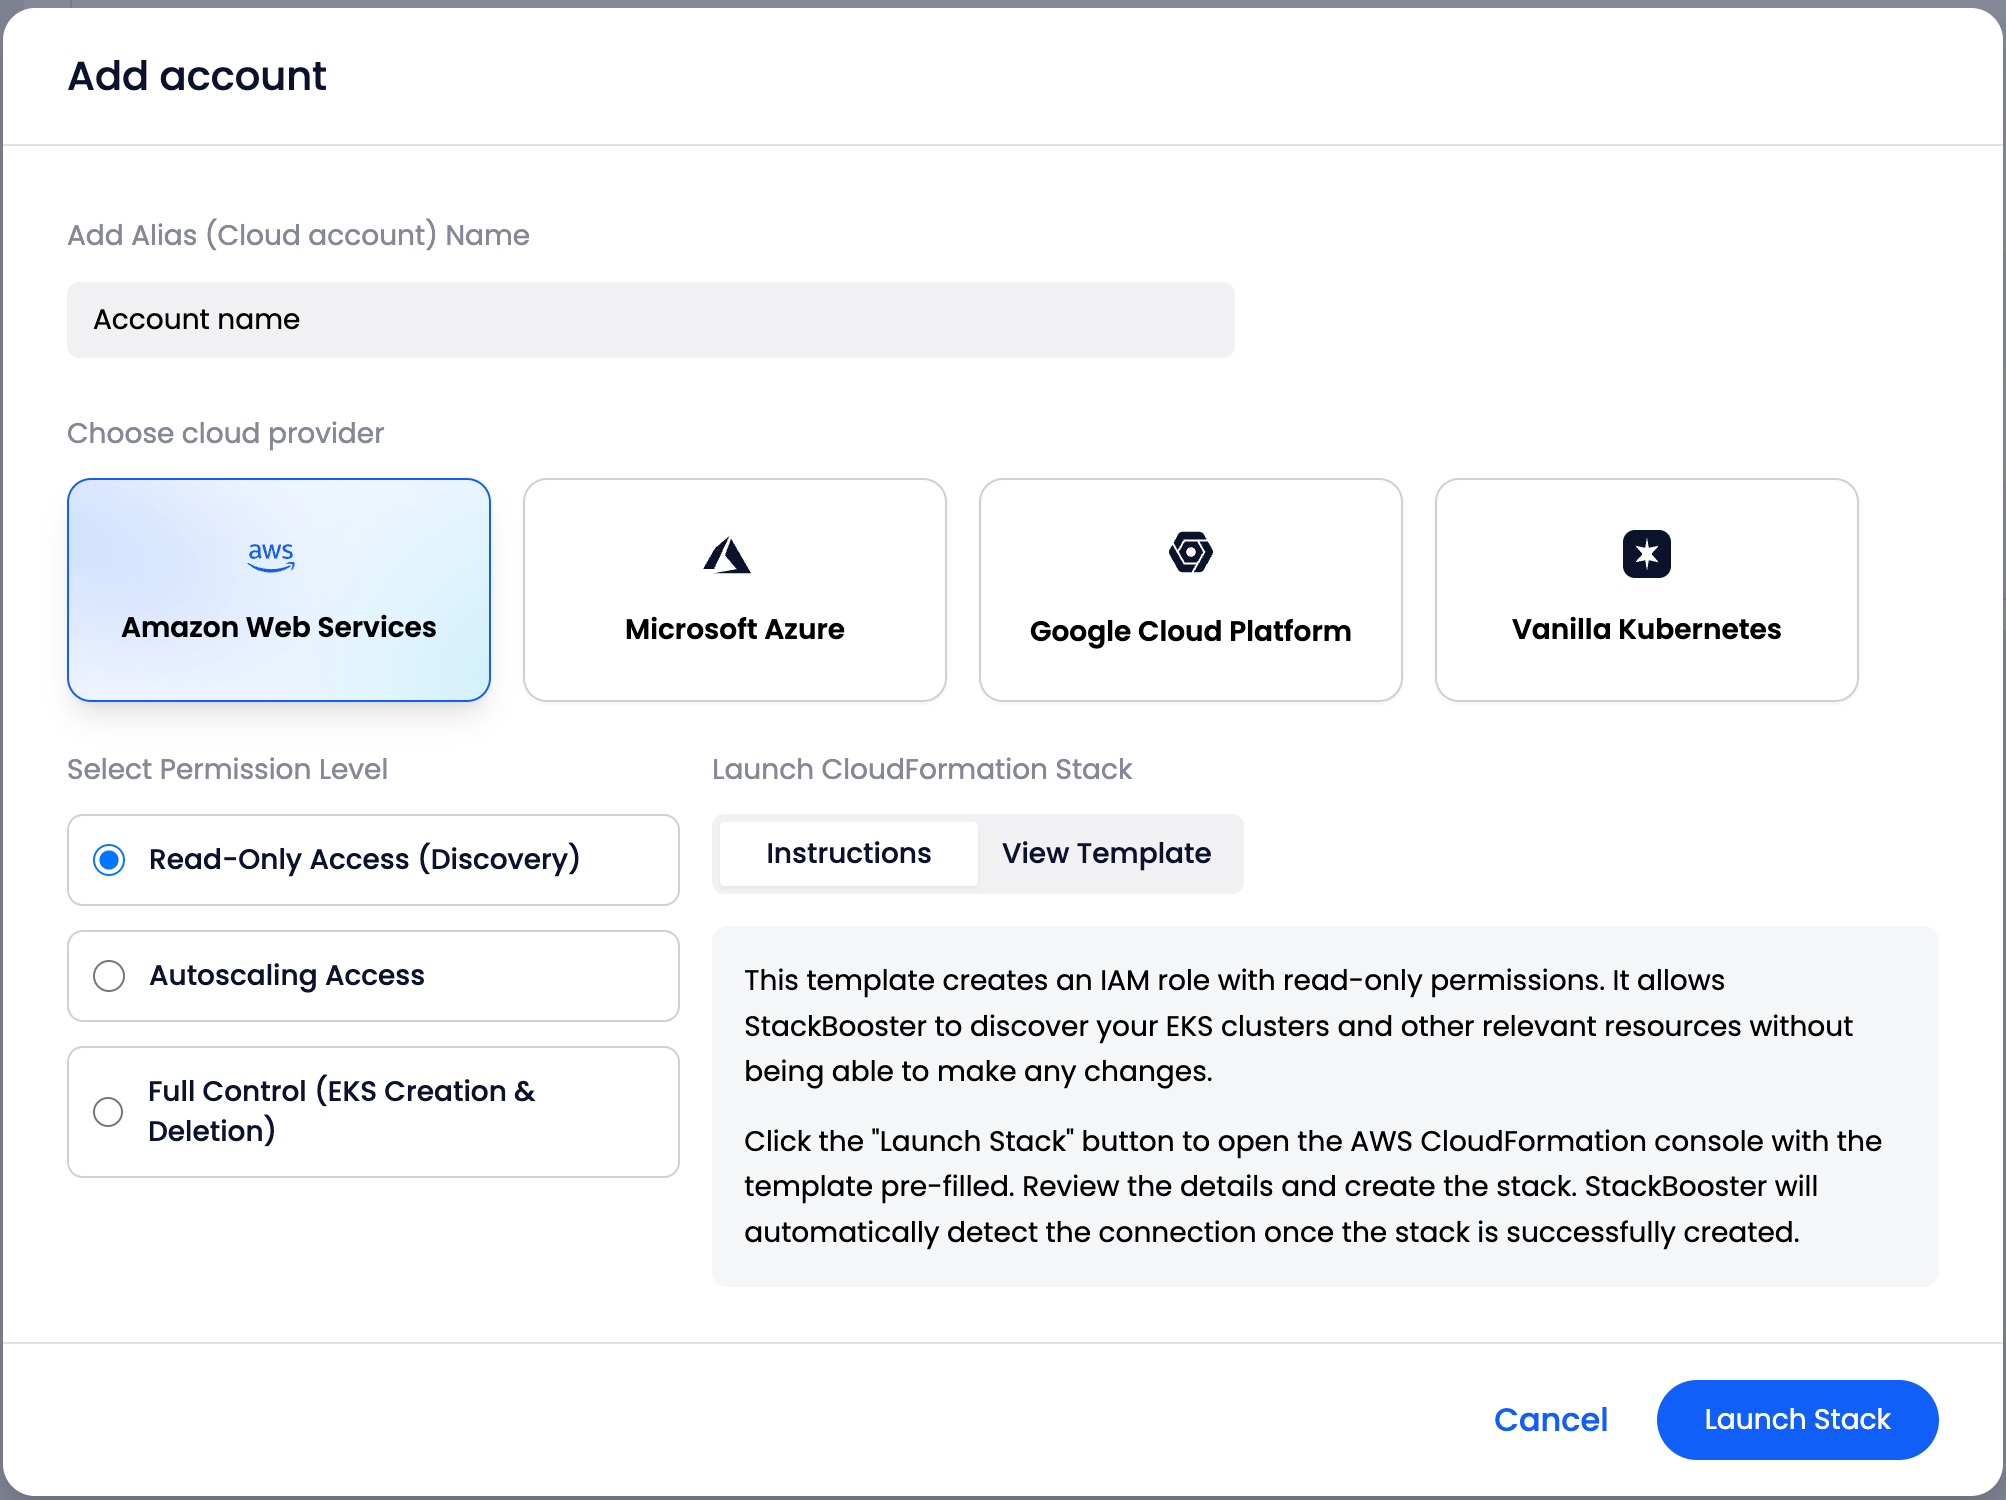
Step 6: Launch CloudFormation Stack #
Click the Launch Stack button to proceed. This will:
- Open the AWS CloudFormation console in a new tab
- Pre-fill a CloudFormation template that creates the necessary IAM role and policies
- The template creates an IAM role with the permissions corresponding to your selected access level
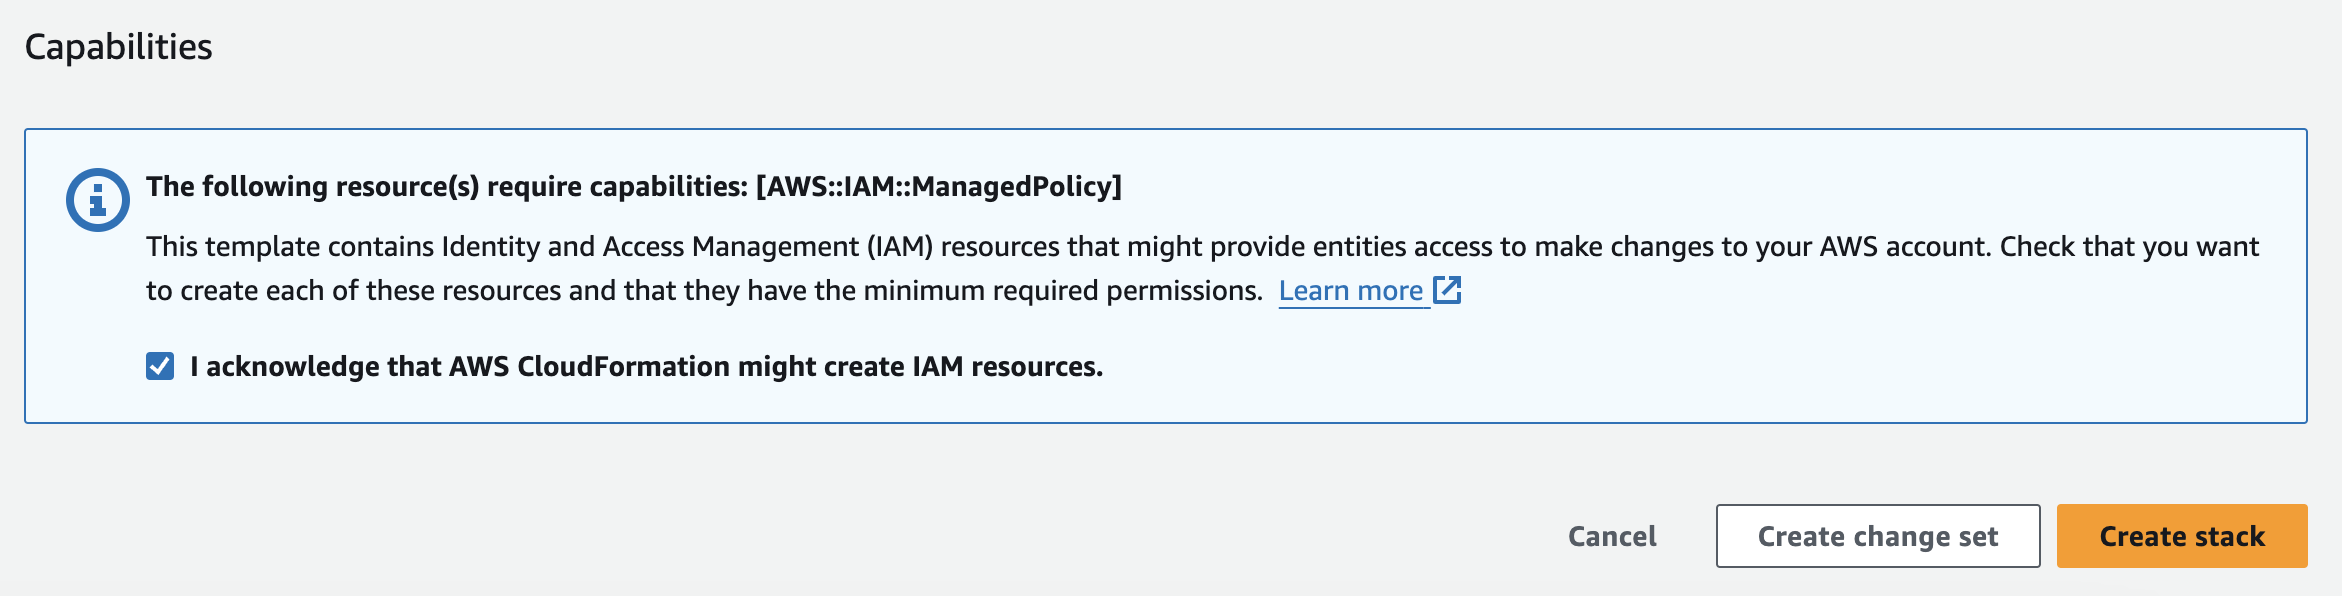
Step 7: Complete Stack Creation in AWS #
In the AWS CloudFormation console:
- Review the stack details and parameters
- Scroll to the bottom and check the box acknowledging that AWS CloudFormation might create IAM resources
- Click Create stack to deploy the CloudFormation template
Step 8: Wait for Connection Establishment #
After the CloudFormation stack is successfully created:
- Return to the StackBooster
- StackBooster will automatically detect the new connection
- This process may take a few minutes to complete
Step 9: Verify Connection #
Once connected, your AWS account will appear in the Cloud accounts list with:
- Status: Active (with green checkmark)
- Connection Type: The permission level you selected
- Provider: AWS logo and name
You can now start using StackBooster’s optimization features with your connected AWS account!
Troubleshooting #
If your connection shows “No connection” status after several minutes:
- Verify the CloudFormation stack was created successfully in your AWS account
- Check that the stack creation completed without errors
- Contact StackBooster support if the issue persists
Security Note #
StackBooster uses AWS CloudFormation to create IAM roles with the minimum required permissions for the selected access level. You can review the specific policies and permissions in the CloudFormation template before creating the stack.